 Ducati Scrambler 800 - Service manual > Clutch assembly: clutch cover
Refitting the clutch cover
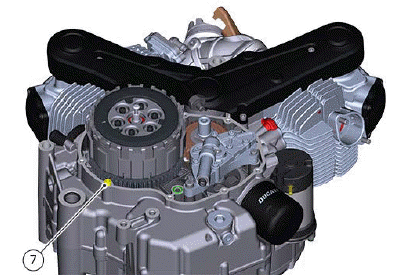
Clean and degrease cover and casing mating surfaces. Check that the casing features the centring bushing (7).
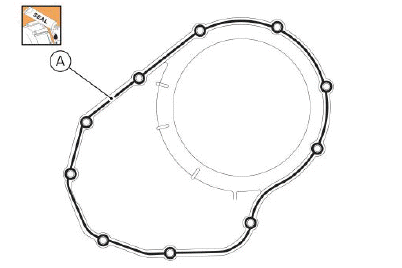
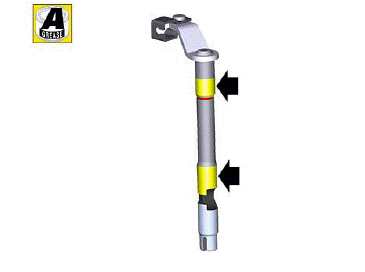
Apply an even, regular bead of DUCATI sealing compound (A) on the mating surface of the crankcase half and around all holes.
Bring cover near the crankcase half and, operating on clutch cover lever, make sure that clutch control pin is duly inserted inside its seat on cover.
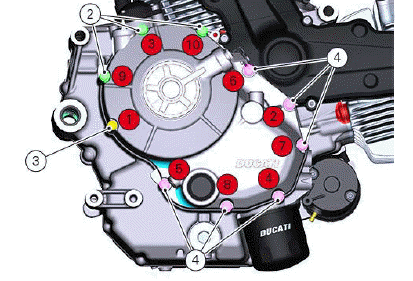
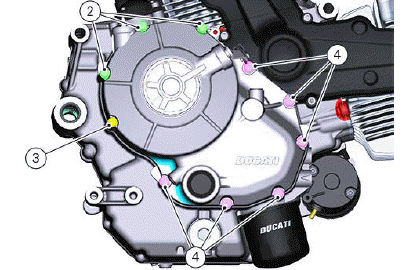
Start the fastening screws (2), (3) and (4) inside the clutch cover.


Tighten the screws to a torque of 13.5 Nm (Min. 12.5 - Max. 14.5).
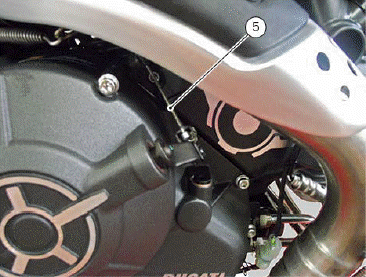
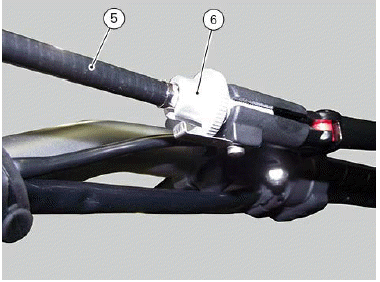
Refit the clutch cable on the clutch cover.
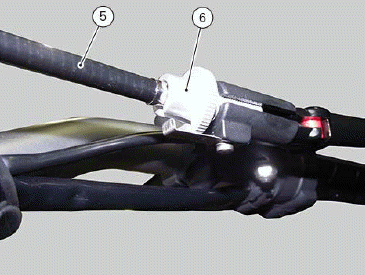
Turn adjuster (6) to tension clutch cable (5) on handlebar.
Screw adjuster (5).
Adjuster (6) standard adjustment is 5 mm from the fully home position.
The maximum adjustment is of 11 mm.
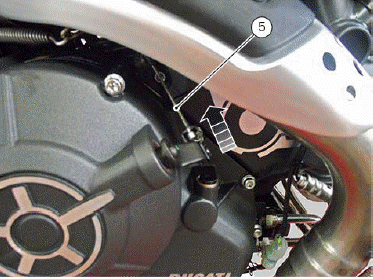
Reposition cable (5) on the clutch cover.
Fill the engine with oil (Changing the engine oil and filter cartridge).
Reassembling the clutch cover
Clutch layshaft
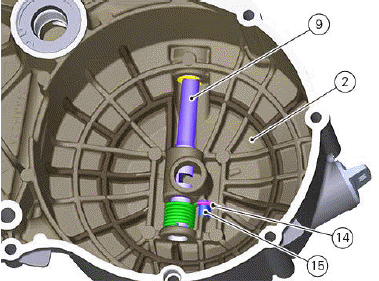
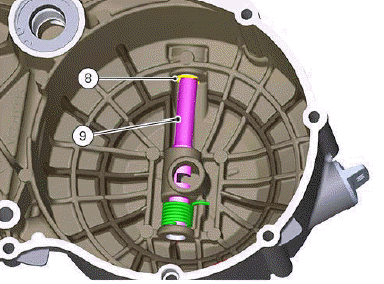
Use the indicated product to lubricate the clutch layshaft (9) in the points indicated in the figure.
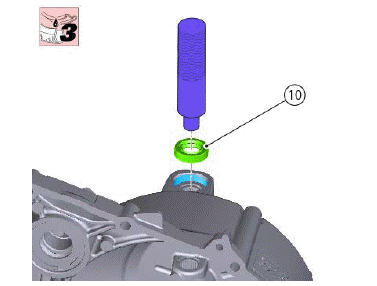
Lubricate seal (10) using the specified product.
Using a suitable tool, drive ring (10) in the clutch cover seat.
Insert clutch layshaft (9) in seal ring (10) having care not to damage it.
Position spring (11). Part (12) must be engaged in recess (13) of shaft (9).

Bring shaft (9) fully against clutch cover (2).
Rotate shaft (9) counter clockwise until part (14) touches mating surface (15).
Fit snap ring (8) on pin (9) and perform a functional test.
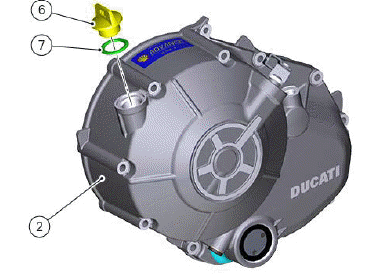
Oil filler cap
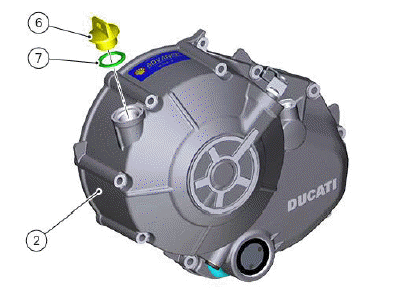
Make sure that the oil filler cap (6) has O-ring (7).
Position plug (6) on cover (2) and tighten it to a torque of 5 Nm (Min. 4.5 Nm - Max 5.5 Nm).
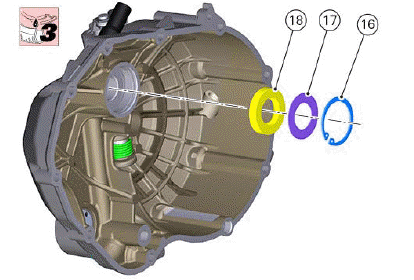
Use the indicated product to lubricate the seal ring (18) and fit it into seat with a suitable tool.
Fit spacer (17) and snap ring (16).
Oil sight glass
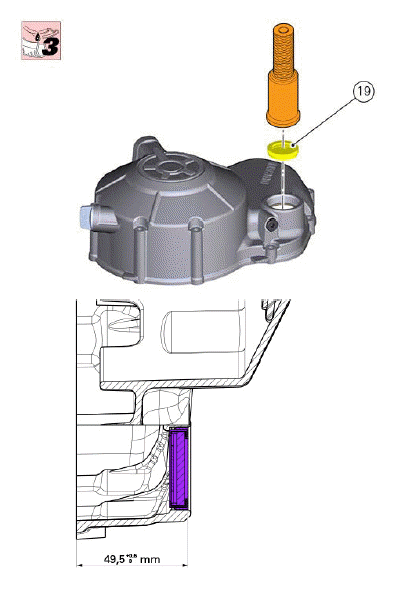
If previously removed, refit the sight glass:
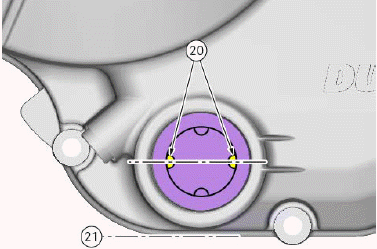
Lubricate sight glass (19) with specified product.
Using a suitable drift, fit the sight glass to the value indicated in the figure.
Make sure that two of the four holes (20) are parallel with the cover bottom (21).
Disassembling the clutch cover
Oil filler cap
Remove the plug (6) with its O-ring (7) from cover (2).
Clutch layshaft
Remove snap ring (8) from clutch layshaft (9).
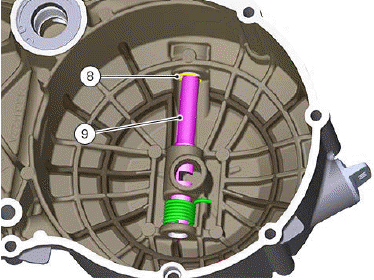
Remove the clutch layshaft (9).
Removing the clutch cover
Drain the engine oil (Changing the engine oil and filter cartridge).
Loosen the fastening screws (2), (3) and (4) on the clutch cover (1).
Screw clutch cable (5) fully home on clutch lever on handlebar, working adjuster (6).
Remove the clutch cable (5) from the clutch cover.
Working on clutch cover lever, slowly remove cover to release it from clutch control pin.
See also:
 Ducati Scrambler 800 - Service manual > Clutch assembly: clutch
Refitting the clutch If the hub - plates - drum assy (9) was disassembled, take special care to clutch plate positioning upon reassembling. Insert the clutch plate pack on hub:
Ducati Scrambler 800 - Service manual > Clutch assembly: primary drive gears
Refitting the primary drive gears and checking backlash Fully degrease the crankshaft splined end and the corresponding spline on the primary drive gear. Check that tab and inner spacer are positioned on the crankshaft.
 Ducati Scrambler
 Fantic Caballero 500
 Indian FTR 1200
 Moto Guzzi V85 TT
 Royal Enfield Bullet Trials Works Replica
 Triumph Scrambler 1200 XE
 Triumph Street Scrambler
 Yamaha XSR700
 Ducati Scrambler 800
 Moto Guzzi V85 TT
 Triumph Scrambler 1200 XC