 Ducati Scrambler 800 - Service manual > Cylinder head assembly: camshafts
Refitting the intake manifold
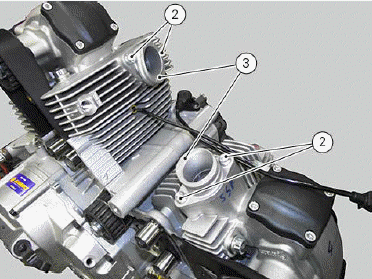
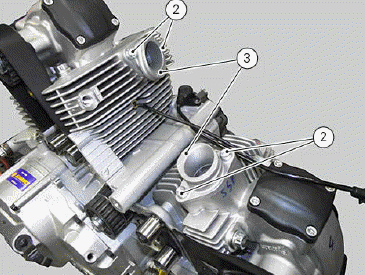
Position intake manifolds (3) and fix them using nuts (2).
Tighten nuts (2) to a torque of 15Nm (Min. 13Nm - Max. 17Nm).
Refit the engine in the frame.
Removing the intake manifold
Remove the engine from the frame.
Loosen clap (1) of the vertical head intake manifold.
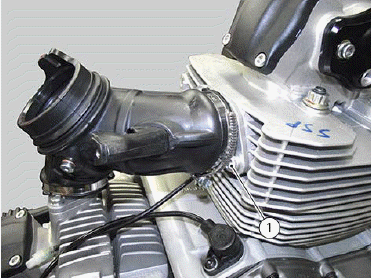
Repeat the same procedure on the horizontal head.

Remove intake manifold.
Loosen and remove nuts (2) securing the vertical and horizontal head intake manifolds.
Remove manifolds (3).
Refitting the camshafts
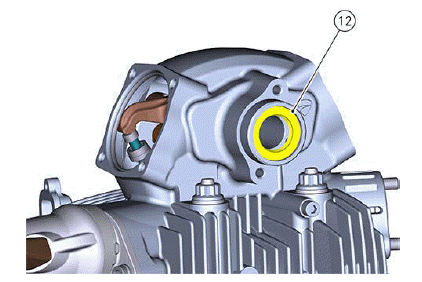
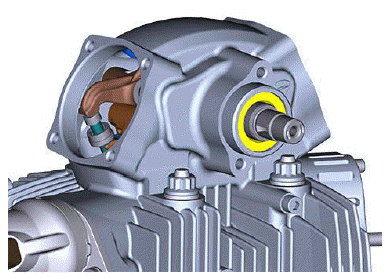
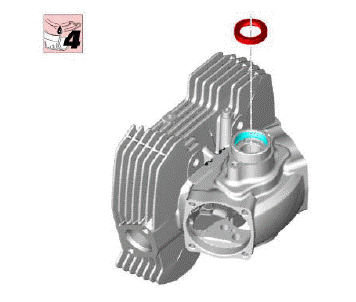
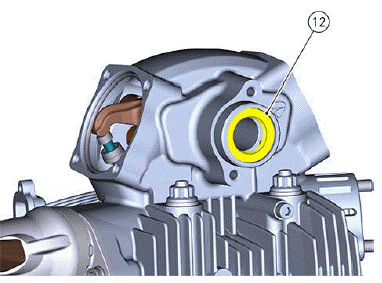
If previously removed, fit seal (12) in its seat on the cylinder head right side using a suitable drift.
Important If valve rocker arms are installed in the cylinder head, to insert the camshaft it is necessary to rotate the camshaft until the cams reach a position that does not interfere with the rocker arms.
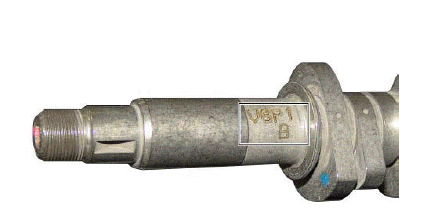
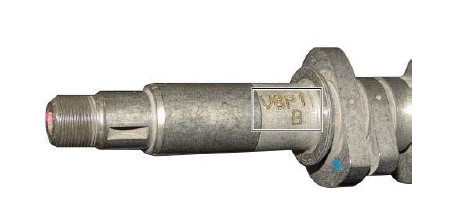
Before fitting the camshaft, check the punched letter on the shaft: "V" stays for vertical whereas "O" stays for horizontal.
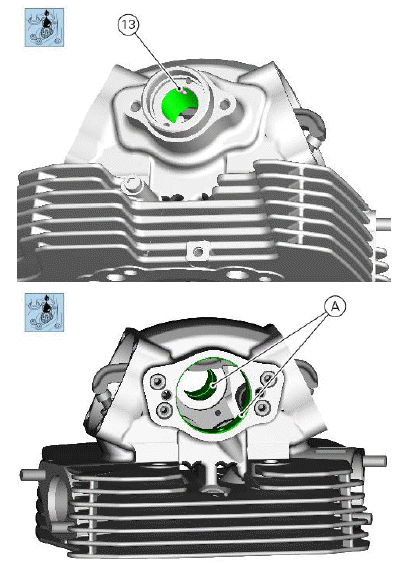
Lubricate the camshaft seats and "tank" (13) and (A) so that during the first engine rotations the camshaft is lubricated.
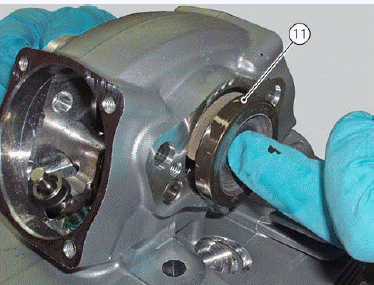
Fit the camshaft (11) from the head LH side.
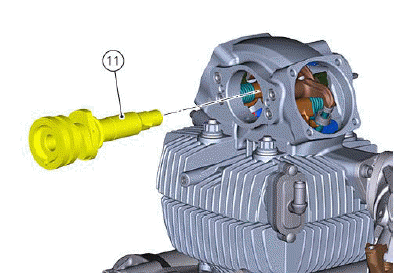
While fitting the camshaft, pay attention not to damage the seal.
Rotate camshaft to evenly lubricate contact areas.
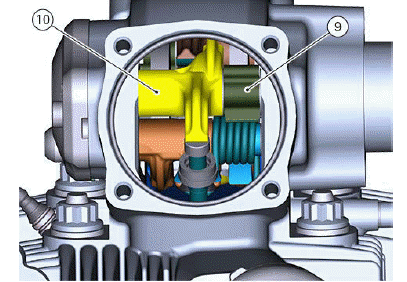
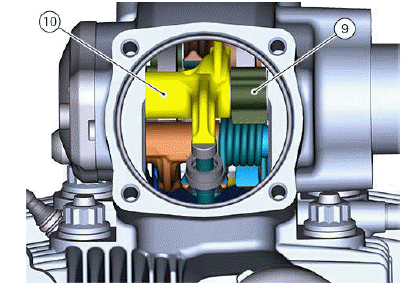
If previously removed, reposition spring (9) of the opening rocker arm (10).
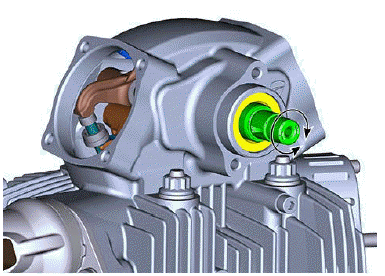
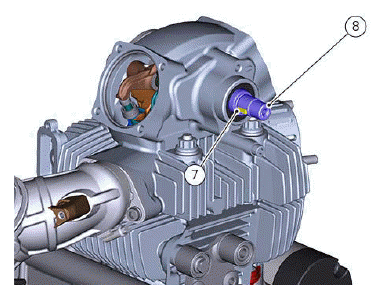
Check the key (7) and its seat conditions and then refit it.
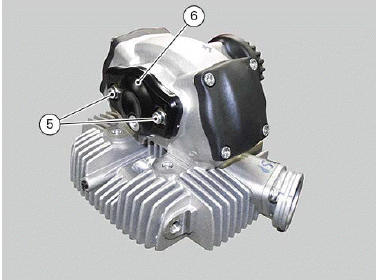
Refitting the side caps
Position cap (6) on the cylinder head LH side.
Fasten cap (6) with screws (5) after applying indicated threadlocker.
Tighten the screws (5) to a torque of 13.5 Nm (Min. 12.5 Nm - Max. 14.5 Nm) following a 1-2-1 sequence

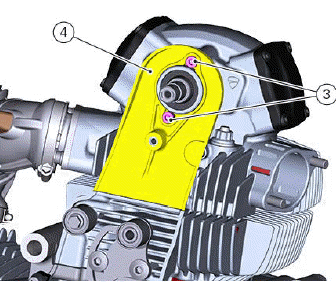
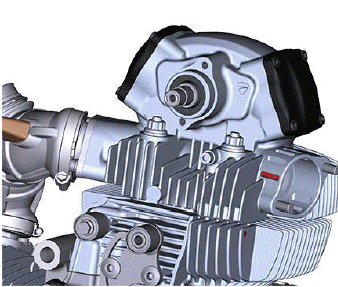
Fitting the timing internal cover
Position cover (4) and tighten screws (3) to a torque of 10 Nm (Min. 9 Nm - Max 11 Nm).
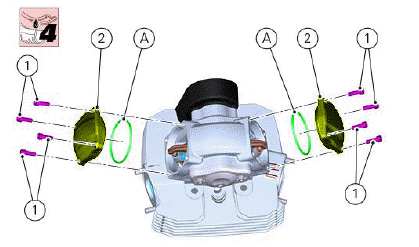
Refitting the valve covers
Fit O-ring (A) in the suitable seat on the valve cover (2).
Lubricate the O-ring with the indicated product.
Position cover (2) and start screws (1) to a torque of 10 Nm (Min. 9 Nm - Max 11 Nm).
Check of the camshafts and supports
Check the cam contact surfaces for scratches, grooves, steps and waving. Worn cams are frequently the cause of poor timing, which leads to loss of engine power. Place the camshaft between two opposite centres and check the run-out using a dial gauge:
- service level: 0.1 mm.
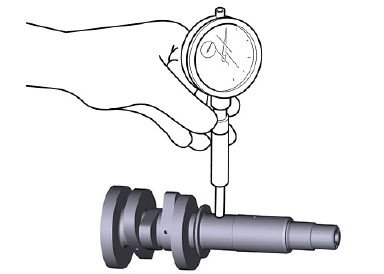
The camshaft has a punched letter:
O = horizontal;
V = vertical.
Oil seal check
Replace the seal upon every engine overhaul.
Install new oil seals keeping them square in their seats using suitable drifts.
After the assembling operations, lubricate the oil seal lip. Pay utmost attention when performing this operation.
Removing the camshafts
Removing the valve covers
Loosen the screws (1) securing valve covers (2) and remove the covers.

Removing the timing internal cover
Remove the head pulley (Removing the camshaft pulleys)
Loosen screws (3) and remove cover (4).

Removing the rocker arm shaft cap
Loosen screws (5) securing cap (6) and remove it.
Remove keyway (7) of camshaft (8).
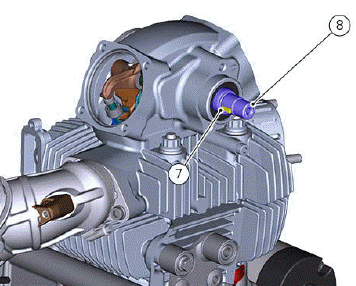
Note Upon disassembly, to avoid damaging the components, rotate the camshaft until the cams are in a position that does not interfere with the rocker arms.
To facilitate the operations with installed rocker arms, remove spring (9) of the opening rocker arm (10).
Slide cylinder head camshaft (11) out of its seat.
Remove the snap ring (12) from the cylinder head.
See also:
 Ducati Scrambler 800 - Service manual > Removing the cylinder head pulley/fixed tensioner
To remove the head pulleys fit tool part no. 88713.3152 on the pulley to block its rotation and use the bush of tool part no. 88700.5644 inserted in a torque wrench or a ratchet wrench to loosen ring nut (8) that retains the pulley.
 Ducati Scrambler
 Fantic Caballero 500
 Indian FTR 1200
 Moto Guzzi V85 TT
 Royal Enfield Bullet Trials Works Replica
 Triumph Scrambler 1200 XE
 Triumph Street Scrambler
 Yamaha XSR700
 Ducati Scrambler 800
 Moto Guzzi V85 TT
 Triumph Scrambler 1200 XC