 Moto Guzzi V85 TT - Service manual > Disc Inspection
FRONT
CAUTION THE FRONT BRAKE DISC SHAPE DOES NOT CHANGE THE OPERATING AND MAINTENANCE SPECIFICATIONS OF THE SYSTEM.
- The following operations must be carried out with the brake discs fitted on the wheel; they refer to a single disc, but are valid for both.
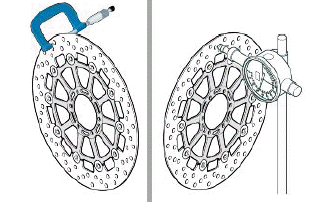
- Check the disc for wear by measuring the minimum thickness with a micrometer in different points. If the minimum thickness, even in a single point of the disc, is less than the minimum value, replace the disc.
Disc thickness minimum value: 4 mm (0.16 in)
- Using a dial gauge, check that the maximum oscillation of the disc does not exceed the tolerance; otherwise, replace it.
Disc oscillation tolerance: 0.15 mm (0.0059 in), with respect to the wheel centre line.
Removal
The following procedure is described for a single calliper, but is valid for both front brake callipers.
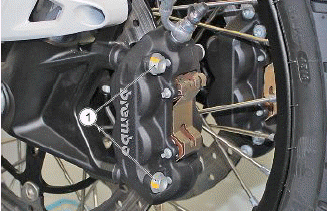
- Unscrew and remove the screws (1)
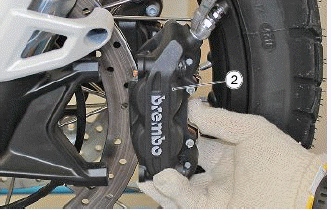
- Remove the front brake calliper (2) from the brake disc
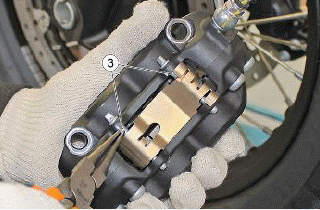
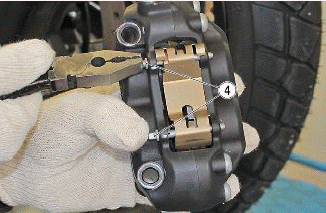
- Remove the two retaining springs (3)
- Remove the two pins (4)
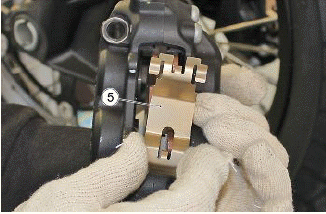
- Remove the spring (5)
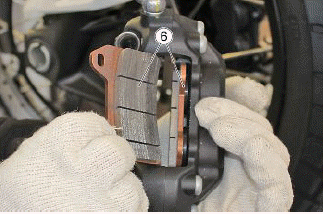
- Remove the brake pads (6) one at a time
CAUTION AFTER REMOVING THE PADS, DO NOT OPERATE THE BRAKE LEVER OR THE CALLIPER PLUNGERS COULD GO OUT OF THEIR SEATS RESULTING IN BRAKE FLUID LEAKAGE.
Installing
The following procedure is described for a single calliper, but is valid for both front brake callipers
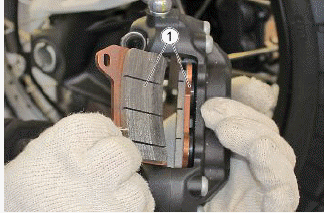
- Insert the new pads correctly (1)
CAUTION ALWAYS REPLACE BOTH PADS AND MAKE SURE THEY ARE CORRECTLY POSITIONED INSIDE THE CALLIPER.
- Insert the spring (2)
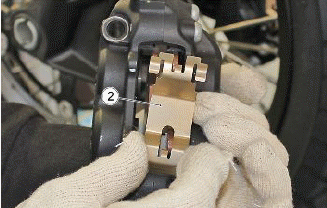
- Insert the two pins (3)
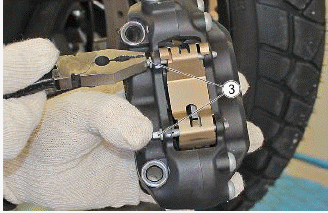
- Insert the two retaining springs (4)
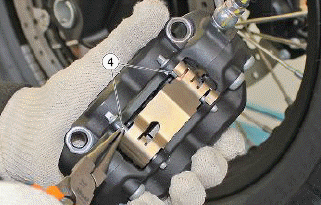
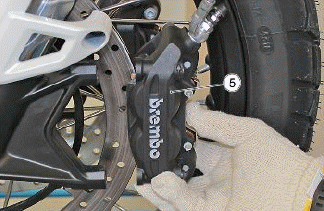
- Insert the front brake calliper (5) on the brake disc
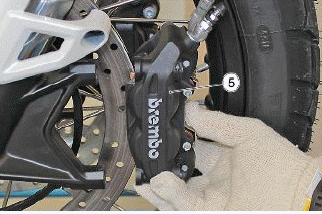
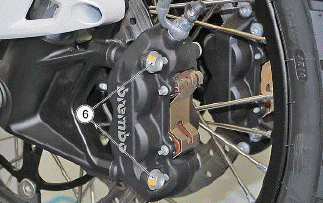
- Insert the two screws (6) and tighten them
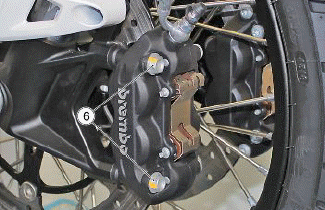
- Insert the front brake calliper (5) on the brake disc
- Insert the two screws (6) and tighten them
Removal
- Connect the bleeder bottles to the calliper bleeder screw and open
- Press the lever down as far as it will go and block it in position using a clamping device in order to prevent the liquid from escaping from the system when it is open.
- Close the calliper bleeder screw and remove the bleeder bottle.
- Loosen the two grub screws (1)
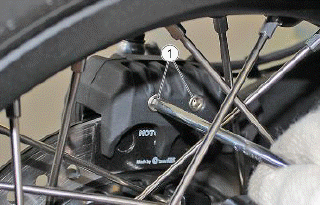
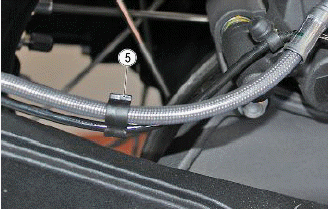
- Free the brake calliper line from the cable grommet (2)
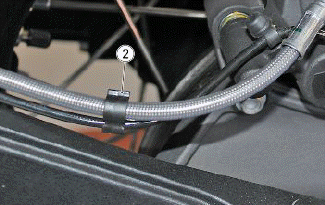
- Unscrew and remove the two screws (3)
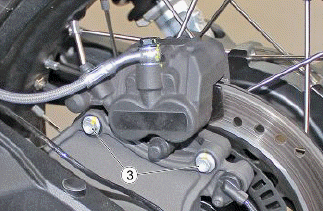
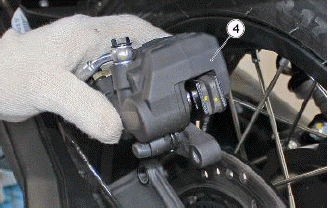
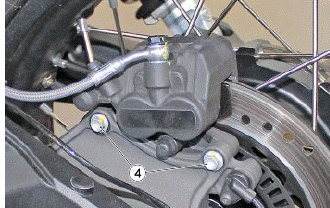
- Remove the rear brake calliper (4) from the brake disc
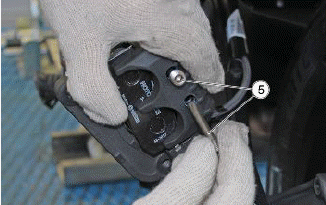
- Unscrew and remove the two grub screws (5).
- Remove the brake pads (6) one at a time
CAUTION AFTER REMOVING THE PADS, DO NOT OPERATE THE BRAKE LEVER OR THE CALLIPER PLUNGERS COULD GO OUT OF THEIR SEATS RESULTING IN BRAKE FLUID LEAKAGE.
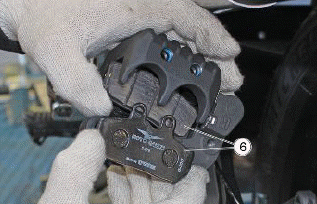
Installing
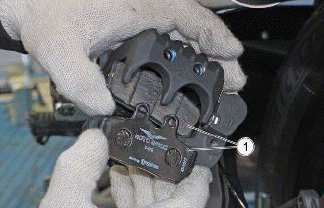
- Insert the new pads correctly (1)
CAUTION ALWAYS REPLACE BOTH PADS AND MAKE SURE THEY ARE CORRECTLY POSITIONED INSIDE THE CALLIPER.
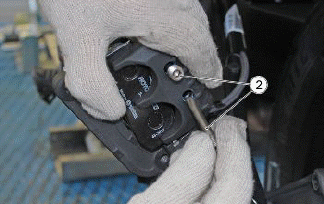
- Insert and tighten the grub screws (2)
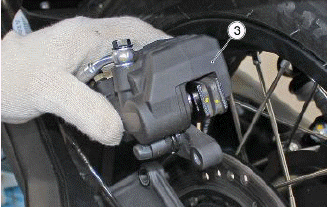
- Insert the rear brake calliper (3) on the brake disc
- Insert and tighten the screws (4)
- Insert the brake calliper line into the cable grommet (5)
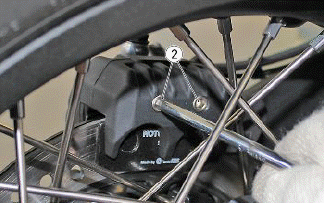
- Tighten the two grub screws (2)
See also:
 Moto Guzzi V85 TT - Service manual > Component maintenance
The vehicle is equipped with two-channel ABS. In other words, it works on both the front and rear wheel. Periodically and each time the wheels are remounted, the phonic wheel or the sensor is replaced, it is important to check that the distance is consistent over all 360Âş. To do this, use a feeler gauge and check the distance between the sensor and the phonic wheel on three points at a distance of 120Âş.
 Moto Guzzi V85 TT - Service manual > Bleeding the braking system
PREPARING THE VEHICLE It is important to ensure that there is always a sufficient quantity of brake fluid in the tank. These operations may be simplified by using a bleeding device when carrying out the "Replacing the brake fluid" operations In this case, when performing the bleeding procedure, it is also necessary to operate the brake pedal a few times with the bleeder device connected (approximately five times for each wheel circuit).
 Ducati Scrambler
 Fantic Caballero 500
 Indian FTR 1200
 Moto Guzzi V85 TT
 Royal Enfield Bullet Trials Works Replica
 Triumph Scrambler 1200 XE
 Triumph Street Scrambler
 Yamaha XSR700
 Ducati Scrambler 800
 Moto Guzzi V85 TT
 Triumph Scrambler 1200 XC