 Ducati Scrambler 800 - Service manual > Refitting the cylinder/piston assembly
If new parts are used, it is necessary to match cylinders and pistons of the same selection.
The letter that indicates the cylinder selection is punched on its upper side, in the cylinder-head coupling surface; the letter that indicates the piston selection is punched on its crown, between the two valve recesses.
If the pistons have been separated from their cylinders, before reassembling these components, position the piston ring gaps at 120Âş from one another (the markings must always face the piston crown).
Using a universal tool, gently insert the piston in the cylinder (lubricate the cylinder inner side with engine oil before inserting the piston).
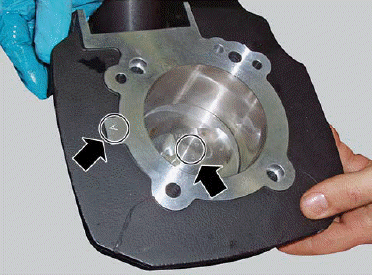
Remove any deposits and degrease the contact surfaces of the crankcase half and the cylinders.
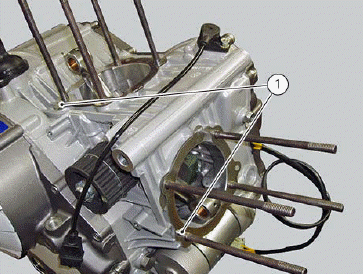
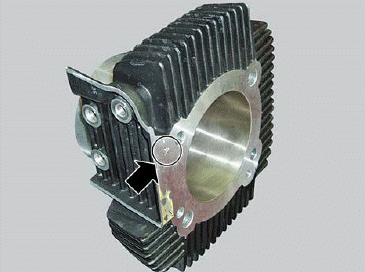
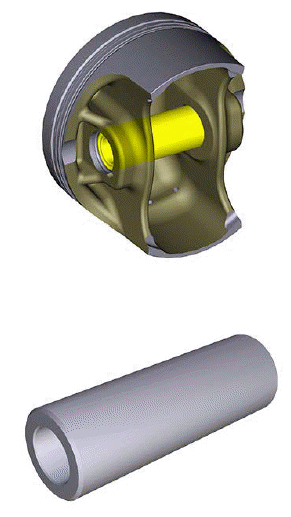
Check that pin (1) is installed on the engine block.
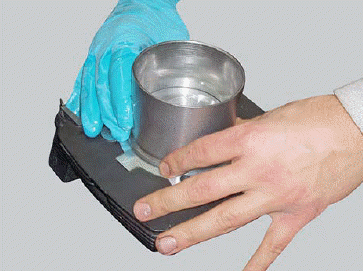
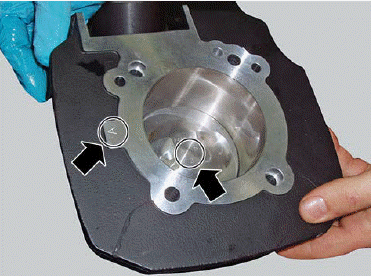
Apply a layer of sealing compound on the gasket (8) contact surface, as required for the vertical cylinder (V) and the horizontal cylinder (O).
The sides touching gasket (6) are:
Side touching the vertical cylinder.
Side touching the casing near the vertical cylinder.
Side touching the horizontal cylinder.
Side touching the casing near the horizontal cylinder.
Position gasket (8) on the casing with the "TOP" wiring facing up.

Overhauling the cylinder/piston components
Overhauling the cylinder
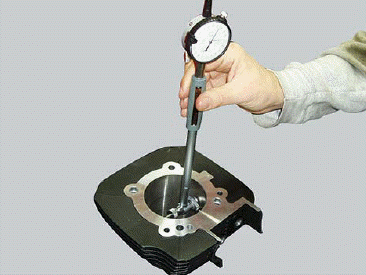
Check that the walls of the cylinder are perfectly smooth. Measure the cylinder diameter at three different heights and in two directions at 90Âş between them to obtain the coupling, tape and ovality value.
In the event of damage or excessive wear the cylinder must be replaced as it has a silicon carbide coating (which provides the cylinder walls with excellent anti-friction and anti-wear properties) and therefore cannot be ground.
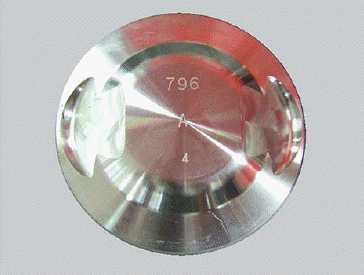
The cylinders are marked with a letter (stamped in a specific area on the cylinder side) indicating their size class.
Always match cylinders with pistons from the same size class.
Overhauling the piston
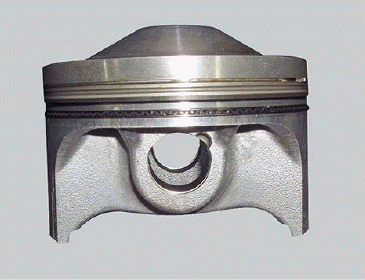
Clean the piston crown and piston ring grooves, removing any carbon deposits.
Visually inspect the piston and check its dimensions carefully: there must be no signs of scuffing, scoring, cracks, or other damage.
Check the piston diameter.
The pistons must always be replaced as a pair.
Piston - cylinder coupling
The pistons are marked with a letter (punched into the piston crown) that indicates the size class to which they belong.
Always match cylinders with pistons from the same size class.
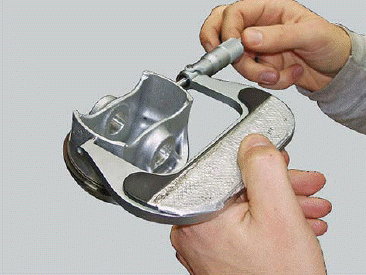
Overhauling the gudgeon pins
Gudgeon pins must be perfectly smooth without signs of scoring, steps, or blueing due to overheating.
The well-lubricated gudgeon pin must slide smoothly inside the piston without stiffness.
The clearance upon fitting must be 0.002Ă·0.008 mm.
The maximum permissible wear limit is 0.035 mm.
If a new gudgeon pin is fitted, you must also change the connecting rod small end bush.
Overhauling the piston rings
The piston rings must not show any signs of scuffing or scoring. Spare pistons are supplied complete with piston rings and gudgeon pin.
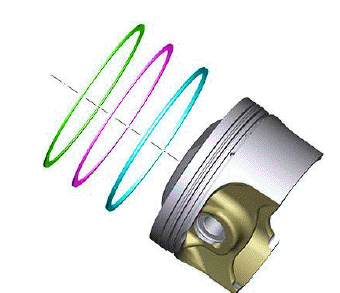
Piston ring-grooves coupling
The maximum permissible wear limit is 0.15 mm for the upper ring (1st) and 0.10 mm for the others (2nd and oil scraper ring).
Note The piston rings must always be fitted with markings facing upwards.
Piston-gudgeon pin coupling
Measure the piston ring gap.
Upper and intermediate ring (nominal): 0.20Ă·0.40 mm.
Wear limit: 0.80 mm.
Oil scraper ring (nominal): 0.30Ă·0.60 mm.
Wear limit: 1.0 mm.
See also:
 Ducati Scrambler 800 - Service manual > Removing the cylinder/piston assembly
Remove the engine from the frame (Removing the engine). Remove the heads (Removing the engine heads) Slide out of the cylinder surface the pin (1), bushings (2) and head gasket (3).
 Ducati Scrambler
 Fantic Caballero 500
 Indian FTR 1200
 Moto Guzzi V85 TT
 Royal Enfield Bullet Trials Works Replica
 Triumph Scrambler 1200 XE
 Triumph Street Scrambler
 Yamaha XSR700
 Ducati Scrambler 800
 Moto Guzzi V85 TT
 Triumph Scrambler 1200 XC