 Ducati Scrambler 800 - Service manual > Lubricating the chain
O-ring chains have sealed, life-lubed link studs and bushes.
However, these chains need to be lubricated at regular intervals to protect metal parts of the chain and the O-rings.
Lubrication also serves to keep the O-rings soft and pliable to ensure the maximum sealing efficiency.
Using a brush, apply a thin protective layer of high-density gearbox oil along the entire length of the chain both inside and outside.
Washing the chain
Chains with O-rings must be washed in oil, diesel fuel or paraffin.
Do not use fuel, trichloroethylene or other solvents which will damage the rubber O-rings.
For the same reason use only sprays specifically formulated for use with O-ring chains.
Refitting the rear sprocket
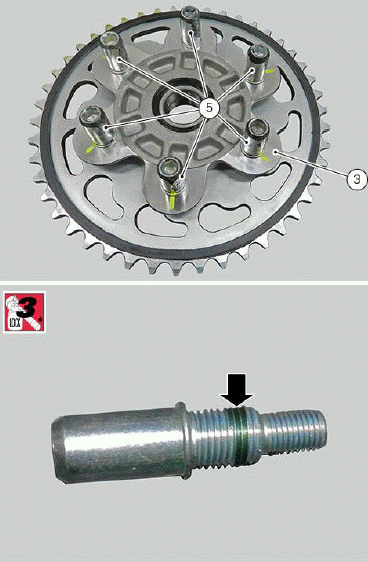
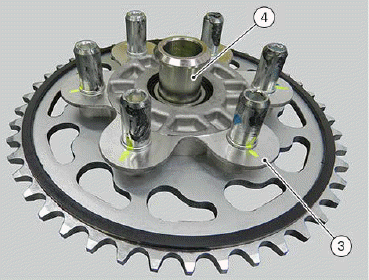
If removed, screw pins (5) to the rear sprocket flange (3) with specified threadlocker applied in the indicated point.
Tighten the pins to a torque of 46 Nm +- 5%.
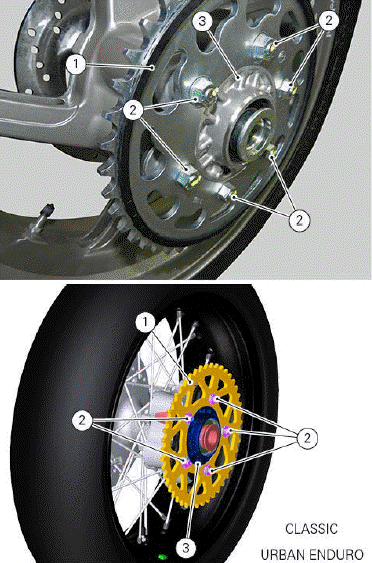
Position rear sprocket (1) on rear sprocket flange (3) and start nuts (2).
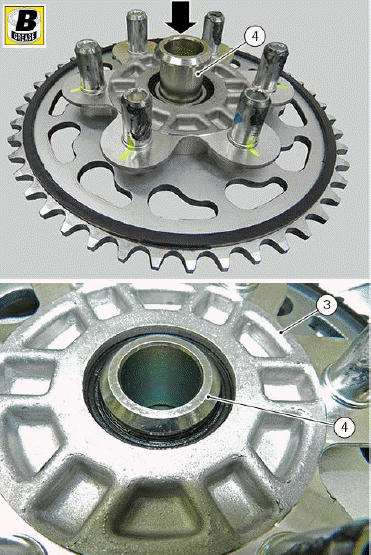
Insert spacer (4) fully home.
Lubricate the pins with the recommended product.
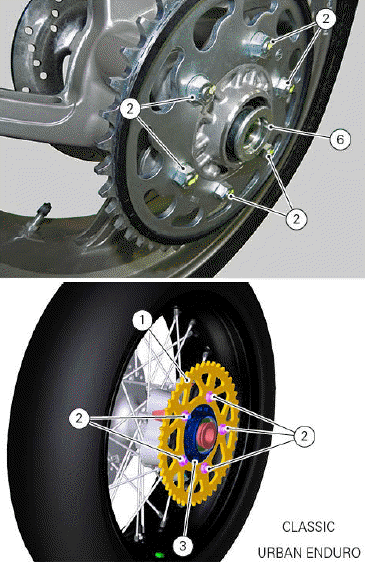
Position the rear sprocket flange-rear sprocket assembly in the rear wheel.
Fit spacer (6) and tighten nuts (2) to a torque of 46 Nm +- 5%.
Refit the rear wheel (Refitting the rear wheel).
Removing the rear sprocket
Remove the rear wheel (Removing the rear wheel).
Loosen nuts (2) retaining rear sprocket (1) to rear sprocket flange (3).
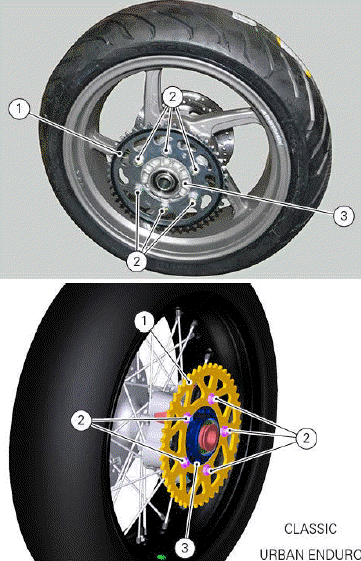
Remove the rear sprocket flange (3) from the rear wheel.
Remove spacer (4).
Loosen the nuts retaining the rear sprocket to the rear sprocket flange previously loosened.
See also:
 Ducati Scrambler 800 - Service manual > Refitting the front sprocket
Check that the splines of the gearbox secondary shaft and the sprocket are in perfect condition. Insert the sprocket on the gearbox secondary shaft and push it over the groove (7).
 Ducati Scrambler
 Fantic Caballero 500
 Indian FTR 1200
 Moto Guzzi V85 TT
 Royal Enfield Bullet Trials Works Replica
 Triumph Scrambler 1200 XE
 Triumph Street Scrambler
 Yamaha XSR700
 Ducati Scrambler 800
 Moto Guzzi V85 TT
 Triumph Scrambler 1200 XC