 Ducati Scrambler 800 - Service manual > Overhauling the connecting rod assembly
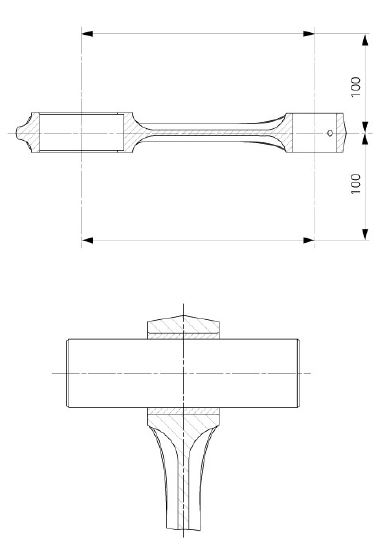
Make the following dimensional checks on the connecting rods:
- clearance with gudgeon pin upon fitting.
In case of excessive wear, replace the connecting rod. The small end bush must be in good condition and firmly driven into its seat.
Check the parallelism error measured at 100 mm from the connecting rod longitudinal axis: it must be H-h lower than 0.02 mm; otherwise, replace the con-rod.
Connecting rod big-end diameter must be within the specified limits.
It is preferable to use crankshafts and connecting rods of the same size class.
Replacing connecting rod big end bearings
It is good practice to replace the bearings (4) each time the engine is overhauled.
Spare bearings are supplied ready for fitting and they must not be reworked with scrapers or emery cloth.

Overhauling the crankshaft
The journals for main bearings and crank pin should not be scored or grooved.
The threads, keyways, and slots must be in good condition.
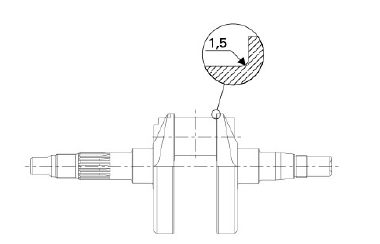
Check for fretting or burrs in the fillet between journal and shoulder.
Fillet radius: 1.5 mm.
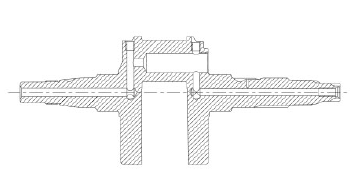
Use a micrometer to measure oval and taper value of the crank pin. Measure oval and taper in several different directions.
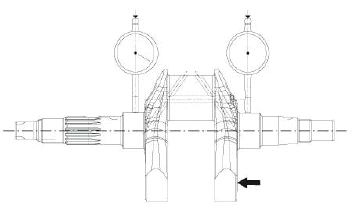
Use a dial gauge to measure the alignment of the main journals by positioning the crankshaft between two centres.
Loosen all crankshaft plugs (5), (6) and (7), heating the crankshaft, if necessary, to remove the sealant applied at the time of assembly.
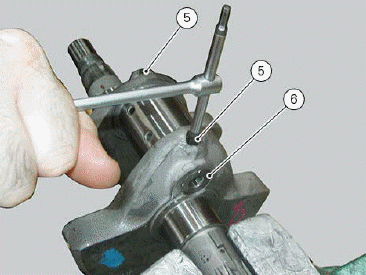
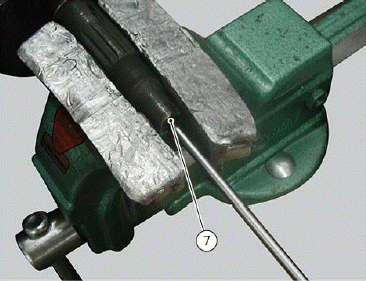
To carry out this operation, use a heat gun able to reach 150 ÂşC.
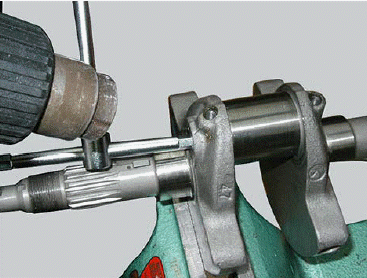
Clean all the oilways using suitable diameter metal brushes and then blow with compressed air to remove any residues that may have accumulated and are restricting the oil flow.
Apply specified threadlocker to the threads of plugs (5), (6) and (7), then refit them.
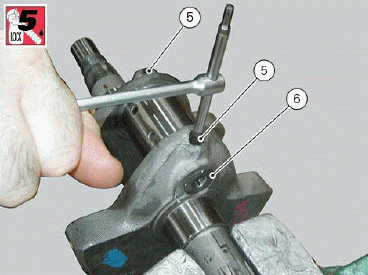
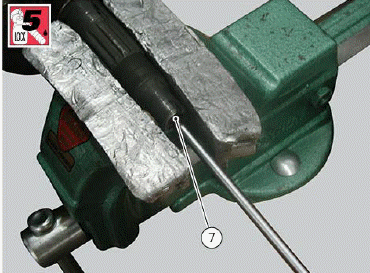
Tighten plugs (5) and (7) to a torque of 13 Nm (Min. 11 Nm - Max. 15 Nm) and plug (6) to a torque of 15 Nm (Min. 13.5 Nm - Max. 16.5 Nm).
Big-end bearing-crank pin clearance
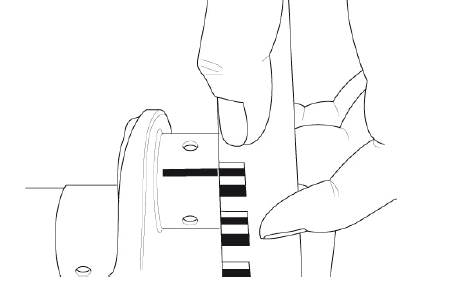
To check the assembly clearance between the bearing shells and crankshaft use a strip (A) of GREEN "Plastigage PG-1" on the journal.
Fit the connecting rod with the original bearings (4) and tighten the screws (3) to a torque of 49 Nm.
Remove the connecting rod and compare the thickness of the strip to the scale.
If the detected shim, corresponding to the present clearance, does not fall within the specified limits
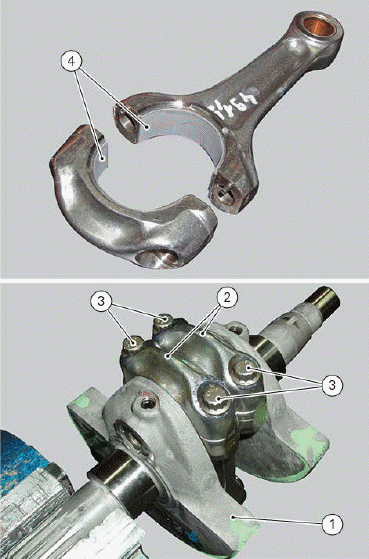
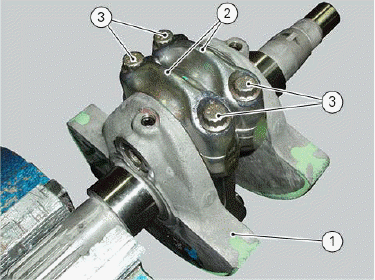
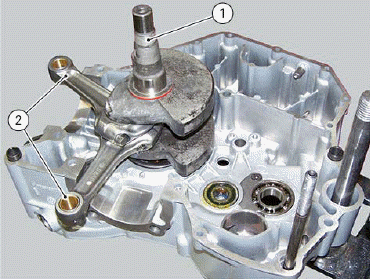
Disassembling the connecting rod assembly
Important Take care not to mix up components of different connecting rods and maintain the original orientation.
To disassemble the connecting rod assembly, loosen screws (3) and separate connecting rods (2) from crankshaft (1).
Removing the connecting rod assembly
Remove the engine from the frame (Removing the engine).
Remove the clutch cover (Removing the clutch cover).
Remove the complete clutch unit (Removing the clutch).
Remove the oil pump (Removing the oil pump).
Remove the generator cover (Removing the generator cover).
Remove the heads (Removing the engine heads).
Remove the cylinder (Removing the cylinder/piston assembly).
Remove the starter motor idler gear (Removing the starter motor idler gear).
After separating the crankcase halves, remove the crankshaft (1) complete with connecting rods (2).
See also:
 Ducati Scrambler 800 - Service manual > Reassembling the connecting rod assembly
Before starting, check that the crankshaft main bearing and big-end journals are free of burrs or evident signs of machining: if necessary, clean the surfaces with very fine emery cloth and oil.
 Ducati Scrambler
 Fantic Caballero 500
 Indian FTR 1200
 Moto Guzzi V85 TT
 Royal Enfield Bullet Trials Works Replica
 Triumph Scrambler 1200 XE
 Triumph Street Scrambler
 Yamaha XSR700
 Ducati Scrambler 800
 Moto Guzzi V85 TT
 Triumph Scrambler 1200 XC