 Ducati Scrambler 800 - Service manual > Reassembling the connecting rod assembly
Before starting, check that the crankshaft main bearing and big-end journals are free of burrs or evident signs of machining: if necessary, clean the surfaces with very fine emery cloth and oil.
Check that the grooves are in perfect condition with no signs of forcing.
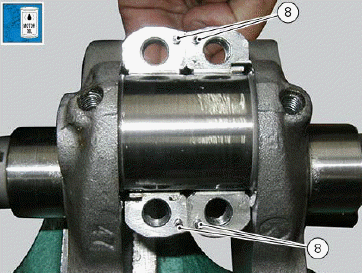
Check that each connecting rod is fitted with its centring pins (8) between cap and the relevant shank.
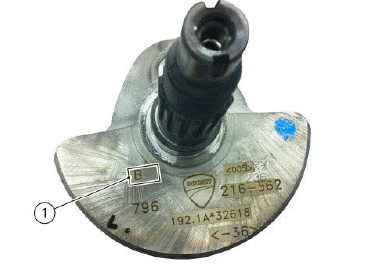
If the crankshaft or one or both con-rods need to be replaced, you must match crankshaft and con-rods according to their weight, as described in the procedure below: Check the crankshaft class (1).
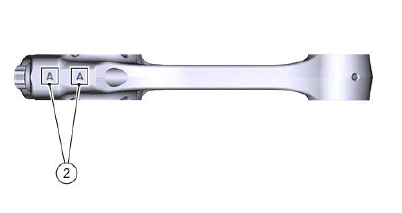
Check the con-rod class (2).
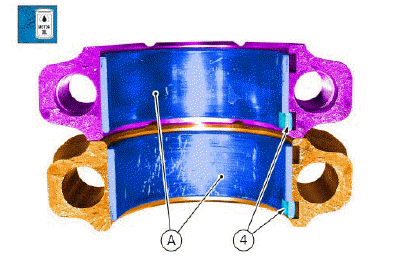
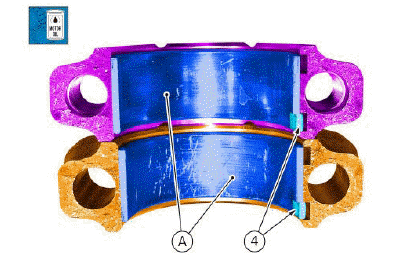
It is good practice to replace the bearings (A) each time the engine is overhauled.
Spare bearings are supplied ready for fitting and they must not be reworked with scrapers or emery cloth.
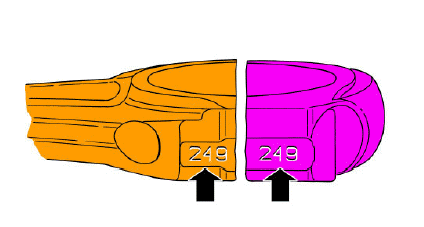
Check that the progressive number punched on the two parts sides is the same, as shown in the figure.
Couple crankshaft and connecting rod big end bearings following the indications provided in the table.

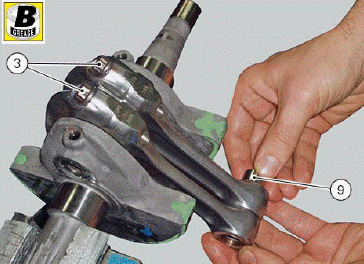
Insert bearing shells in the connecting rod head matching the tooth (4) with the corresponding marks on the connecting rod cap and on the connecting rod shank.
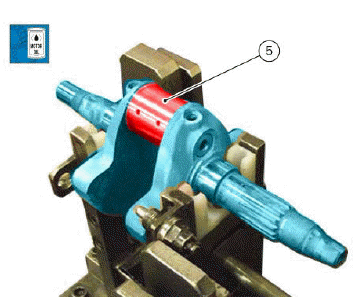
Use the indicated product to lubricate the crank pin (5) and the con-rod big end bearing (4).
Wash the pins and dry them with compressed air.
Clean and use engine oil to lubricate the crank pin and the bearing shells and refit the con-rods on the crankshaft, in the position they were when they were removed.
Fit the cap and the relevant con-rod with the mark on the same side.
Fill the recommended grease into the two ends of the hole to lubricate threads and underside of the new screws (3) and the thread of the shaft.
Warning The grease utilised is irritant in contact with the skin; wear protective gloves.
Important Lubrication of con-rod bolts is essential to obtain the correct coupling and to prevent breakage of the parts.
The con-rod screws may only be used for one tightening.
Temporarily fit the gudgeon pin (9) to align the connecting rods.
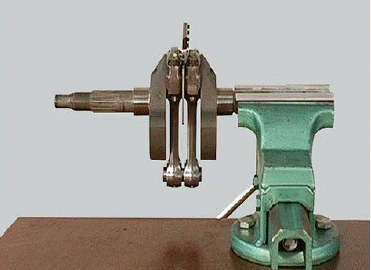
Put the spacer of tool no. 88713.2878 between the con-rods and take up residual axial clearance with the fork feeler gauge of tool no. 88713.2878 which has shims of the following sizes: - 0.1 mm - 0.2 mm - 0.3 mm.
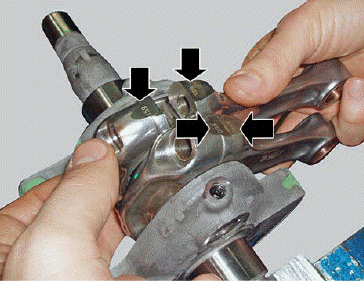
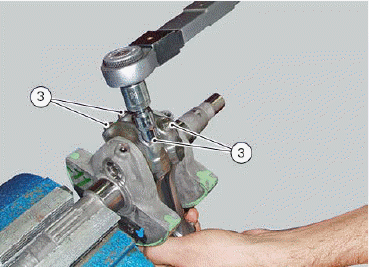
Using a torque wrench as shown in the figure, tighten screws (3) to the values specified here below:
- tighten to 35 Nm;
- pause of 2 seconds and 360Âş loosening;
- pre-tighten again to 20 Nm;
- pre-tighten again to 35 Nm;
- tighten to 65 +-1
- torque check 70Ă·103 Nm.
Remove the feeler gauge and check that connecting rods/crankshaft end float is: 0.15Ă·0.35 mm.
See also:
 Ducati Scrambler 800 - Service manual > Overhauling the connecting rod assembly
Make the following dimensional checks on the connecting rods: clearance with gudgeon pin upon fitting. In case of excessive wear, replace the connecting rod. The small end bush must be in good condition and firmly driven into its seat.
 Ducati Scrambler
 Fantic Caballero 500
 Indian FTR 1200
 Moto Guzzi V85 TT
 Royal Enfield Bullet Trials Works Replica
 Triumph Scrambler 1200 XE
 Triumph Street Scrambler
 Yamaha XSR700
 Ducati Scrambler 800
 Moto Guzzi V85 TT
 Triumph Scrambler 1200 XC