 Triumph Scrambler 1200 XC - Service manual > Starter Drive and Sprag Clutch
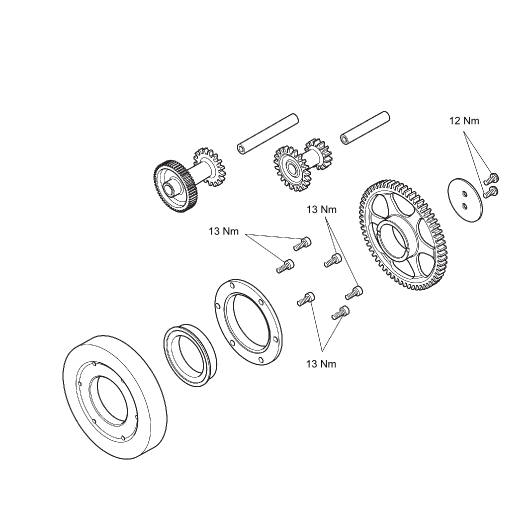
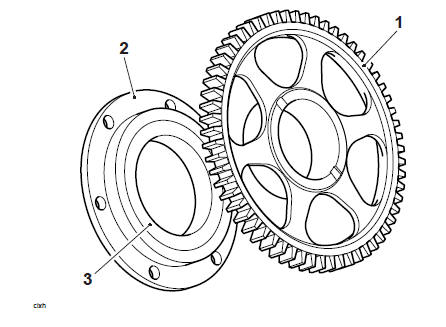
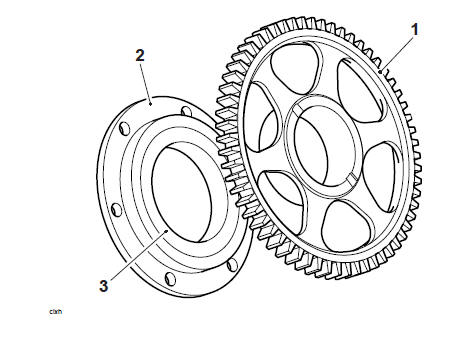
Exploded View - Starter and Sprag
Starter Drive/Sprag Clutch - Removal
WARNING
Before starting work, ensure the motorcycle is stabilised and adequately supported. This will help prevent it from falling and causing injury to the operator or damage to the motorcycle.
Perform the following operations:
- Seat - Removal
- Battery - Removal
- Clutch Cover - Removal
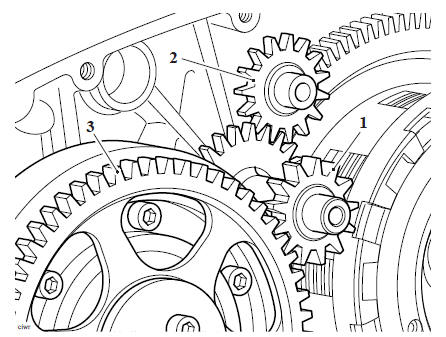
1. Whilst holding the first idler gear in position, withdraw the second starter idler shaft and gear, noting the fitted position of the components.
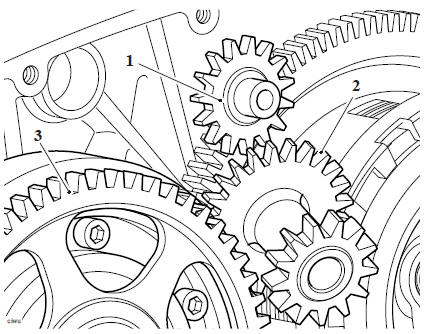
1. Starter idler gear (first) 2. Starter idler gear (second) 3. Starter sprag gear
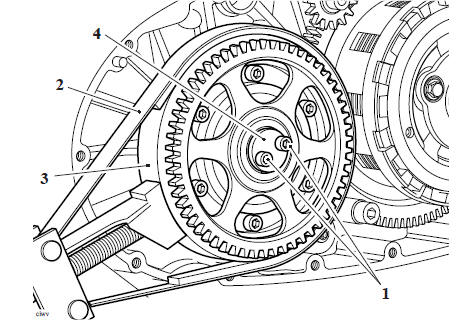
2. Using T3880375 - Alternator Rotor Holder to retain the flywheel, remove and discard the fixings securing the starter gear thrust washer to the sprag clutch housing, as shown below.

- Fixings
- T3880375 - Alternator Rotor Holder
- Sprag clutch housing
- Thrust washer
3. Remove and discard the fixings securing the sprag clutch housing to the flywheel.
- Fixings
4. Withdraw the starter sprag gear and sprag clutch assembly.
Starter Sprag Gear
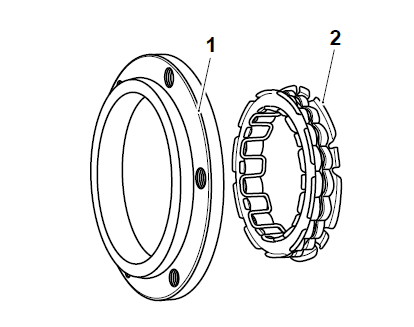
5. Remove the starter sprag gear from the sprag clutch housing assembly
- Starter sprag gear
- Sprag clutch housing
- Sprag clutch
6. Remove the sprag clutch from the sprag clutch housing.

- Sprag clutch housing
- Sprag clutch
Starter Drive/Sprag Clutch - Inspection
1. Check the sprag clutch bearings for overheating, wear and/or non-smooth operation. Replace the sprag clutch if overheating, wear and/or non-smooth operation is found.
2. Examine all gears for chipped teeth and for any other damage.
3. With the sprag clutch mounted in the housing, check the sprag clutch for smooth, free movement in one direction only (as indicated by the arrow marked on the sprag clutch body).
Starter Drive/Sprag Clutch - Installation
1. Locate the sprag clutch to the sprag clutch housing as shown below. Push firmly until the lip seats in the recess provided in the housing.
- Sprag clutch housing
- Sprag clutch
2. Fit the starter sprag gear to the sprag clutch.
3. Lubricate the crankshaft bearing with engine oil.
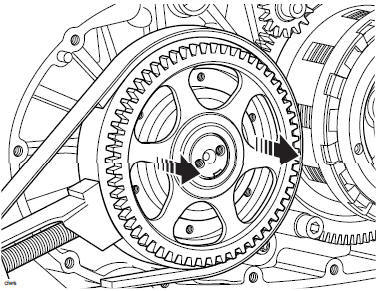
4. Fit the sprag clutch housing to the flywheel.
5. Ensure that the housing is squarely seated and is not jammed on the rotor.
- Starter sprag gear
- Sprag clutch housing
- Sprag clutch
Note
Ensure the sprag is seated and flush fitting to the housing before tightening the fixings fully.
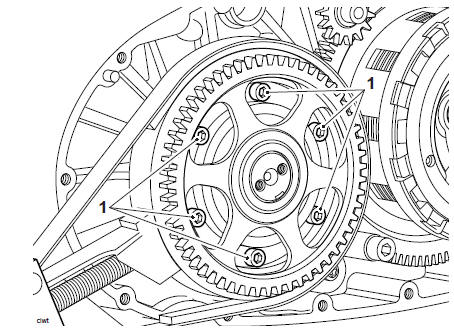
6. Align the drilled holes in the sprag clutch housing with the holes in the flywheel.
Sprag clutch housing assembly
7. Using T3880375 - Alternator Rotor Holder to retain the flywheel and working in the sequence shown below, fit new fixings and tighten to 13 Nm. Repeatedly check the fixings in sequence until all are correctly torqued and do not move when checked, this will ensure the sprag clutch housing is correctly seated on the rotor.
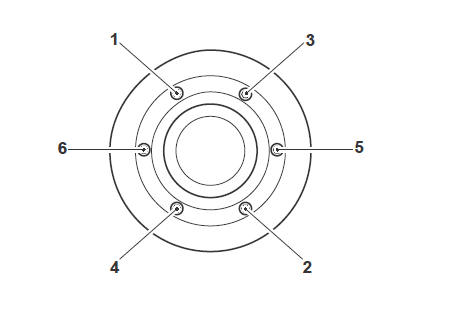
Tightening Sequence
8. Using tool T3880375 - Alternator Rotor Holder Tool to retain the flywheel and using new fixings secure the starter gear thrust washer to the flywheel. Tighten the fixings to 12 Nm.
- Fixings
- T3880375 - Alternator Rotor Holder
- Sprag clutch housing
- Thrust washer
9. Refit the starter idler gear and shaft, as noted during removal.
- Starter idler gear (second)
- Starter idler gear (first)
- Starter sprag gear
Perform the following operations:
- Clutch Cover - Installation
- Battery - Installation
- Seat - Installation
See also:
 Triumph Scrambler 1200 XC - Service manual > Transmission
Exploded View - Input and Output Shafts Exploded View - Gear Selector
Triumph Scrambler 1200 XC - Service manual > Lubrication
Exploded View - Oil Filter and Pump Oil Circuit Diagram
 Ducati Scrambler
 Fantic Caballero 500
 Indian FTR 1200
 Moto Guzzi V85 TT
 Royal Enfield Bullet Trials Works Replica
 Triumph Scrambler 1200 XE
 Triumph Street Scrambler
 Yamaha XSR700
 Ducati Scrambler 800
 Moto Guzzi V85 TT
 Triumph Scrambler 1200 XC