 Ducati Scrambler 800 - Service manual > Changing the fluid in the rear brake circuit
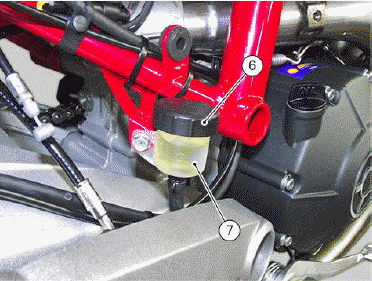
Changing the fluid in the rear brake circuit Unscrew the cover (6) of the rear brake fluid reservoir (7).
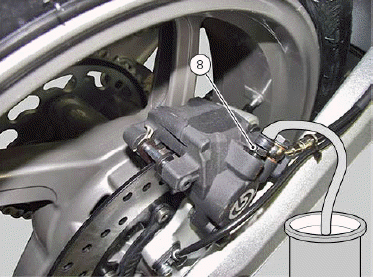
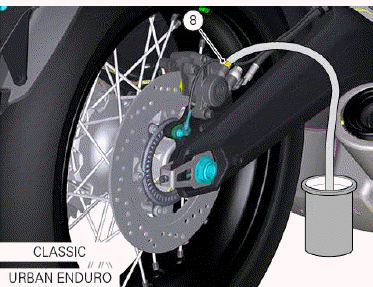
Attach a transparent plastic tubing to the bleed valve (8) and insert the other end of the tubing in a container placed on the floor.
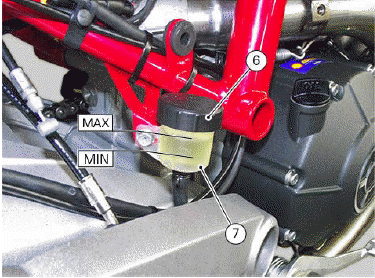
Siphon the fluid from the reservoir (6). Fill the reservoir (7) with new oil up to the MAX mark.
Attention During the filling operation, always keep the fluid level above the MIN mark to avoid any air bubbles in the circuit.
Allow the fluid to flow from the bleeder (8) until it changes colour. Press the pedal two or three times until the circuit is pressurised. Hold pedal depressed.
Open the bleed valve (8) to allow fluid to flow out.
The pedal is at the end of travel when it is in the lower position. Now, screw bleed valve (8) to a torque of 10 Nm +-10%, and release the pedal; press the pedal again.
Repeat the above operation until the old fluid flows out completely.
Warning After draining the old fluid from the reservoir and while filling the system, always keep the fluid level above the MIN mark to avoid any air bubbles in the circuit.
Changing the fluid in the front brake circuit
Warning Brake fluid is corrosive and will damage paint. Avoid contact with eyes and skin. In case of accidental contact, wash thoroughly with water.
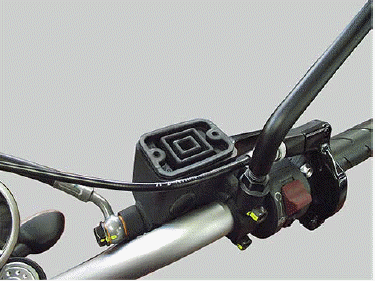
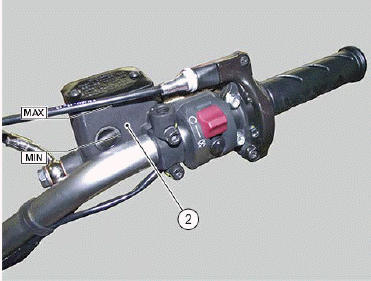
Remove the cover with membrane (1) from the front brake fluid reservoir (2) by undoing the screws (3).
Siphon the fluid from the reservoir (2) using suitable equipment.
Refit the membrane (without the plug) on the reservoir to avoid brake fluid splashes during the following operations.

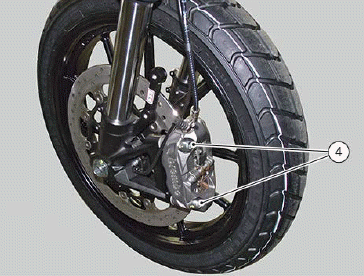
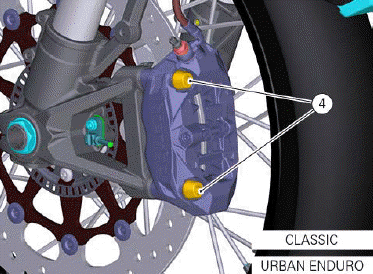
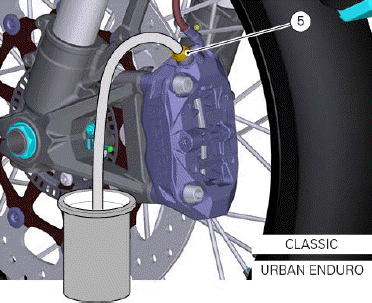
Move the brake calliper pistons back: to carry out this operation undo the fixing screws (4) of the calliper on the fork bottom end and push pads taking them apart; during this operation, be careful with the fluid level, which must always be sucked out each time it flows back in the reservoir.
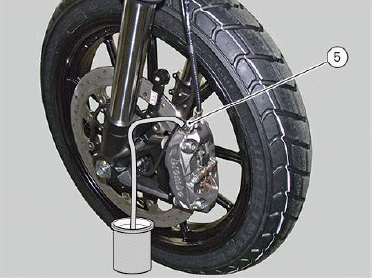
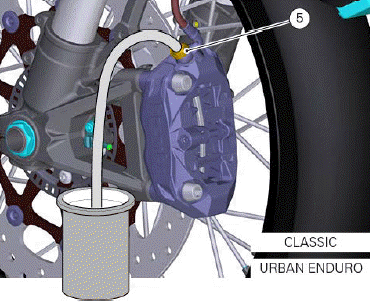
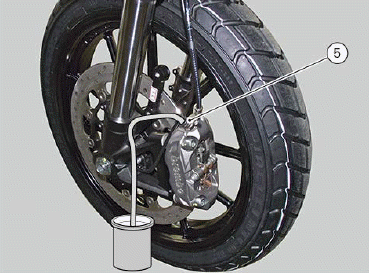
Once that all pistons are fully moved back and that all the fluid in the tank has been sucked out, connect to the bleed valve (5) a transparent tube by immersing the end in a container placed on the floor.
Fill the reservoir (2) with new oil up to the MAX mark.
Pull the lever to make a 20 - 30 mm stroke and keep the lever in this position using a non-elastic clamp.
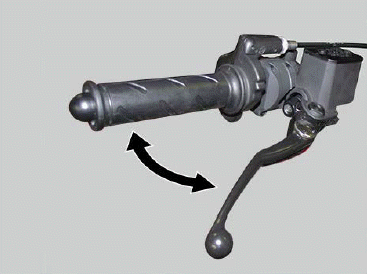
Loosen the bleed valve of the calliper (5) and then take the lever through the whole stroke to allow fluid to flow out.
The lever is resting against the handgrip.
Tighten the bleed valve (5) to a torque of 4 Nm +-10% and then release the lever.
Repeat the above operation until the old fluid flows out completely. Then, with the bleed valve definitely closed to the specified torque actuate repeatedly the lever until a pressure is detected in the brake system.
Warning After draining the old fluid from the reservoir and while filling the system, always keep the fluid level above the MIN mark to avoid any air bubbles in the circuit.
Changing and cleaning the air filters
Remove the side fairings and disconnect voltage regulator (Removing the airbox).
Loosen screws (1) on airbox cover (2).
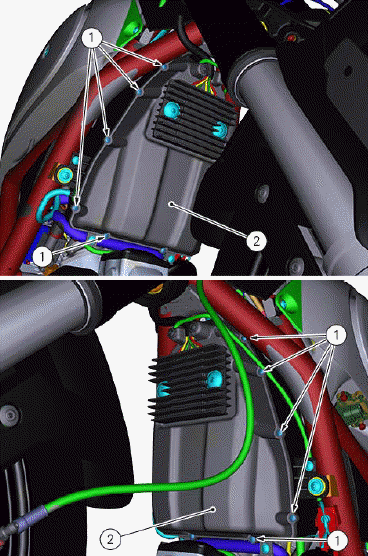
Remove the airbox cover (2).
Remove filter (4) from cover (3).
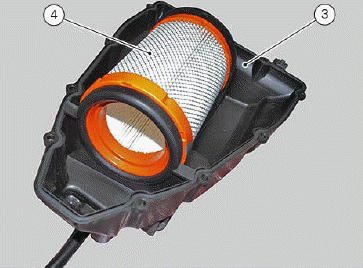
Blow cartridge clean using compressed air or change it.
Important A clogged air filter will reduce air intake and engine power, increase fuel consumption and cause a build up of deposits on the spark plugs. Do not use the motorcycle without a filter as impurities in the air could get into the engine and cause damage.
Properly reinstall cartridge on airbox cover and refit all removed parts, in particular tighten screws (1) to 5 Nm +-10%.
Reconnect voltage regulator.
Important If the motorcycle is used in very damp or dusty conditions, the air filter cartridge must be changed more frequently.
Replacing the spark plugs
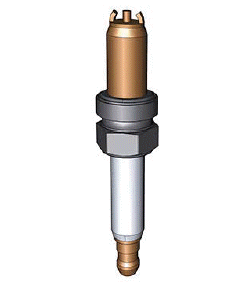
Check the colour of the ceramic insulation around the central electrode: an even, light brown colour indicates the engine is in good condition and running at the right temperature.
Check central electrode for wear.
Warning Do not use spark plugs with inadequate heat rating or incorrect thread length.
The spark plug must be securely installed.
If a spark plug is loose, it can overheat and damage the engine.
Spark plug type
Make: NGK
Type: DCPR8E
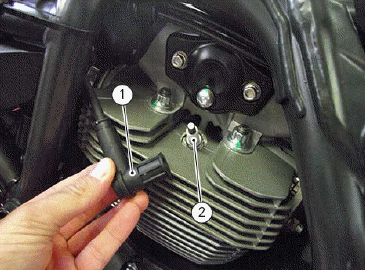
Remove spark plug cap (1), loosen spark plug (2) and remove it.
Change it with a new one having the suitable heat rating.
Repeat this operation on the other head.
See also:
 Ducati Scrambler 800 - Service manual > Adjusting the chain tension
Slowly move the motorcycle until you find the position where chain is tightest. Set the motorcycle on the side stand. Measure chain tension at the centre of the lower section, with the motorcycle on the side stand: lower the chain by pressing down on it only with your finger, release it and measure the distance between the centre of the chain pins and the aluminium section of the swingarm.
Ducati Scrambler 800 - Service manual > Changing the timing belts
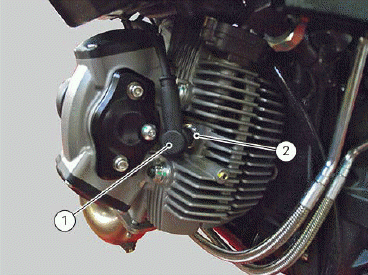
Remove the exhaust system (Removing the exhaust system). Remove the belt covers (Removing the timing belt external covers). Working from vehicle left-hand side, loosen the two screws (3) and remove plug (1) from generator cover (2) .
 Ducati Scrambler
 Fantic Caballero 500
 Indian FTR 1200
 Moto Guzzi V85 TT
 Royal Enfield Bullet Trials Works Replica
 Triumph Scrambler 1200 XE
 Triumph Street Scrambler
 Yamaha XSR700
 Ducati Scrambler 800
 Moto Guzzi V85 TT
 Triumph Scrambler 1200 XC