 Ducati Scrambler 800 - Service manual > Handlebar assembly
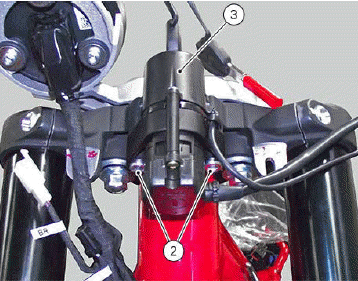
Handlebar assembly: throttle control
Refitting the throttle control
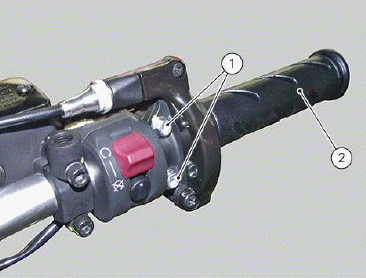
Fit throttle control on handlebar.
Fasten the handlebar as described in chapter "Refitting the handlebar".
Match the throttle control pin (6) with the handlebar seat (7).

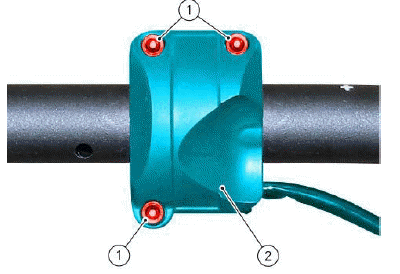
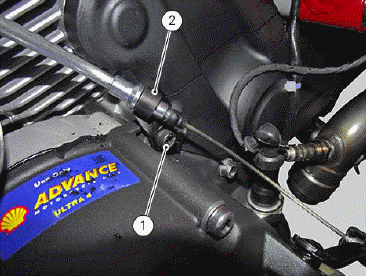
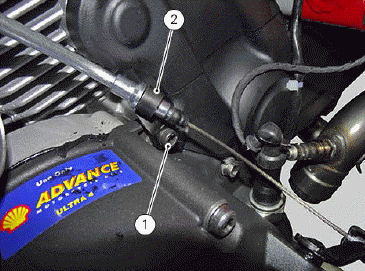
Tighten screws (1) of throttle control (2) to a torque of 6 Nm +- 10%.
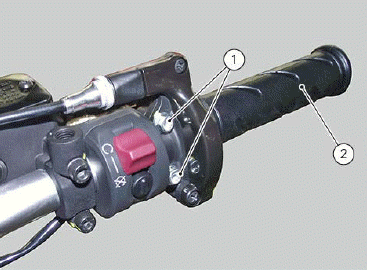
Removing the throttle control
Loosen screws (1) of throttle control (2).
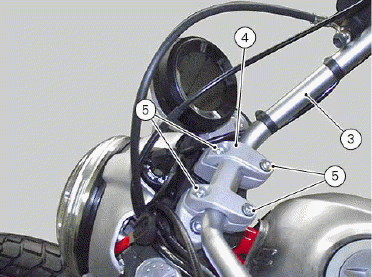
Release handlebar (3) from U-bolt (4) loosening screws (5).
Slide out throttle control (2).
Adjusting the throttle cable
For the throttle control cable adjustment refer to chapter "Adjusting the throttle cable".
Refitting the handlebar
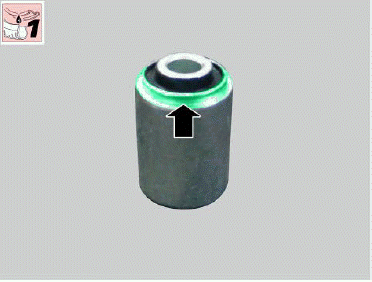
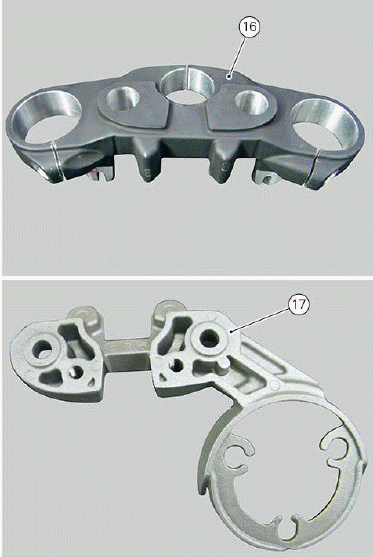
If previously removed, install the silent blocks (18) in the relevant seats in the steering head (16):
- Aim the silent block (18) as shown in the figure;
- Drive the silent block (18) fully home, in line with its seat.
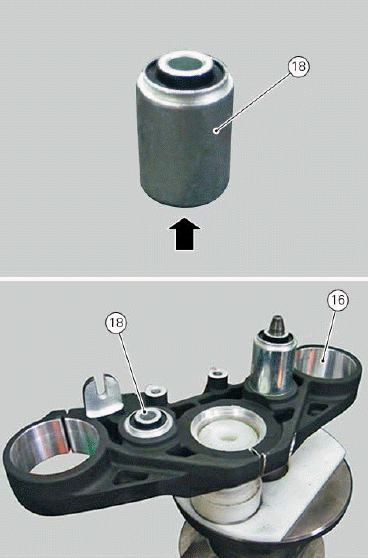
Note Drive the silent-block by working on the outer ring. Before driving the silent blocks, lubricate them with the indicated product.
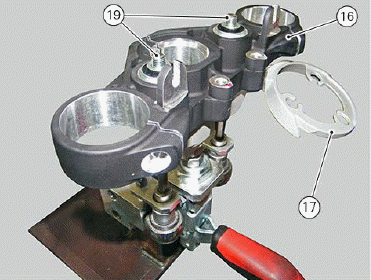
Insert the steering head on the two screws (19) and take it fully home against lower U-bolt (17).
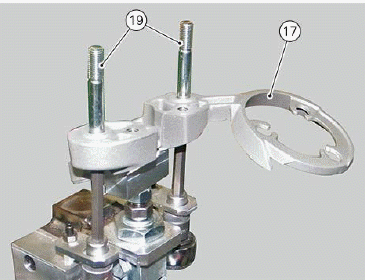
Fit two washers (20) on screws (19) and start two nuts (15).
Screw two nuts (15).

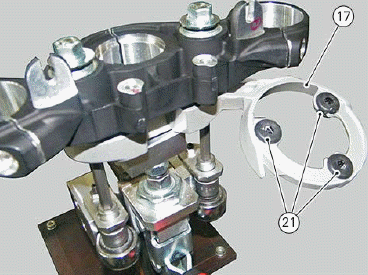
If previously removed, fit rubber blocks (21) in the relevant seats on the lower U-bolt (17).
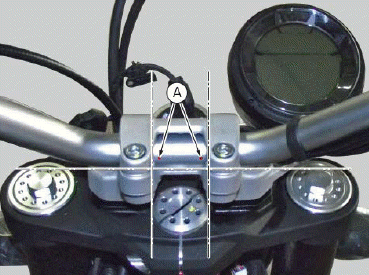
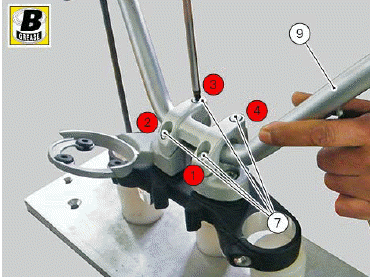
Position handlebar (9) in its seat on the lower U-bolt (17) with the arrows facing the rear side of the vehicle.
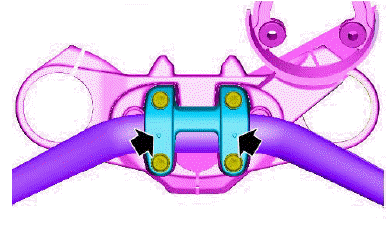
Reference points (A) on handlebar must be at the same distance from U-bolt (8) and flush with the U-bolt surface.
Apply recommended product to screws (7) and tighten to 22 Nm +- 5% in the 1-2-3-4-3 sequence.
Fit left-hand switch on the handlebar.
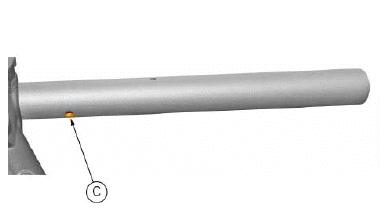
Position the switch (5) so that pin (B) engages in hole (C) on the handlebar.
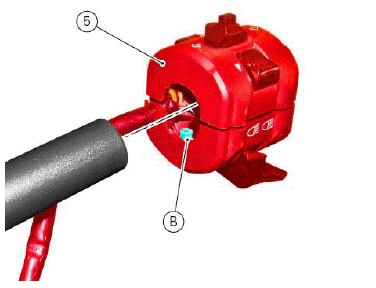
Tighten the screws (4) to a torque of 1.5 Nm +- 10%.
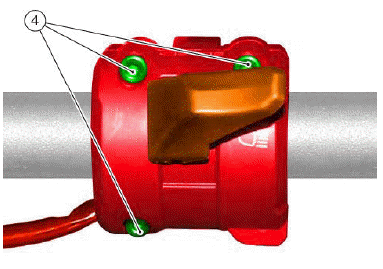
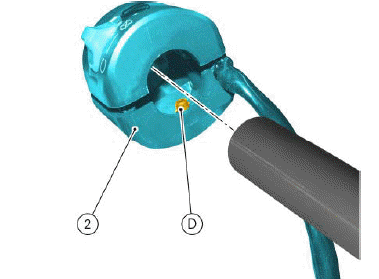
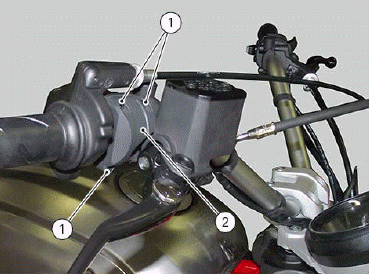
Fit right-hand switch (2) on the handlebar.
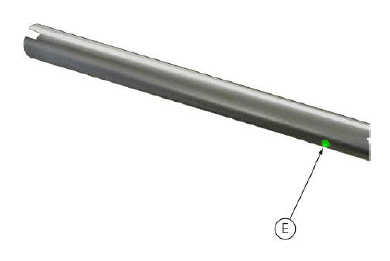
Position the switch (2) so that pin (D) engages in hole on the handlebar (E).
Tighten the screws (1) to a torque of 1.5 Nm +- 10%.
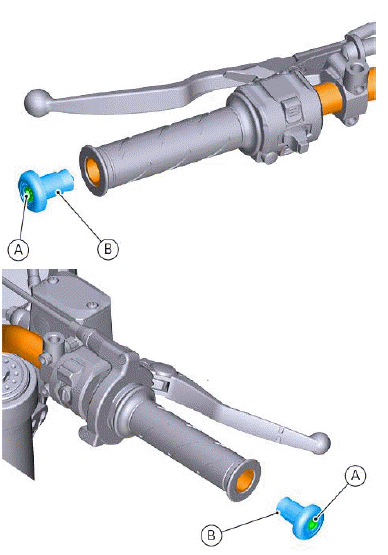
Insert counterweight (B) in the handlebar and fix it with screw (B).
Tighten the screw (B) to a torque of 3.5 Nm +- 10%.

Removing the handlebar
Remove the throttle control (Removing the throttle control).
Remove the complete front brake control (Removing the front brake system).
Remove the clutch control (Removing the clutch assembly).
Handlebar counterweight
Loosen the retaining screw (A) and remove counterweight (B).
Loosen screws (1) retaining switch (2) and disconnect connector (3).
Remove left-hand switch (5), by disconnecting connector (6) and loosening screws (4).
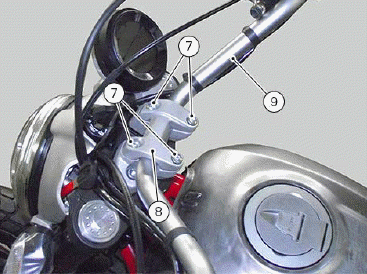
Undo and remove the screws (7).
Remove U-bolt (8) securing the handlebar.
Remove the handlebar (9).
Disconnect instrument panel connector (10).
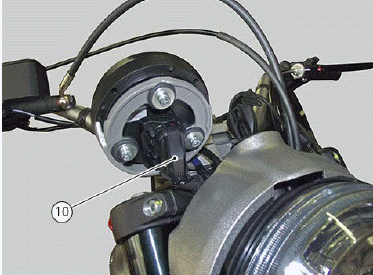
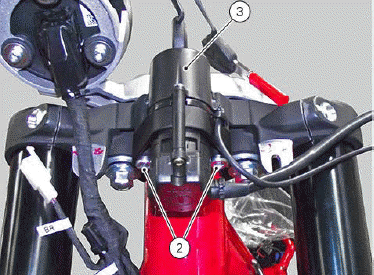
Undo and remove the screws (11) from the steering head.
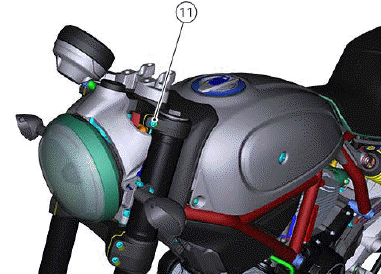
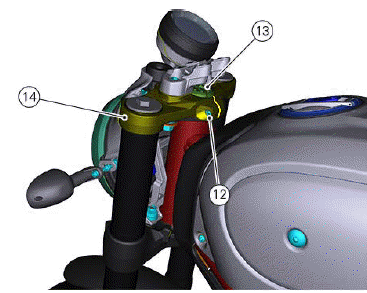
Tighten screw (12) and ring nut (13) and remove the steering head (14).
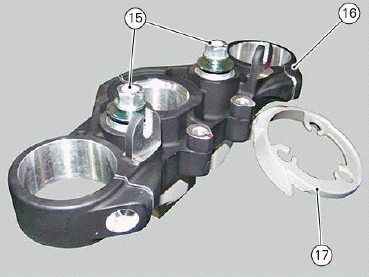
Loosen two nuts (15) and separate the steering head (16) of the lower U-bolt (17).
Handlebar assembly: clutch control
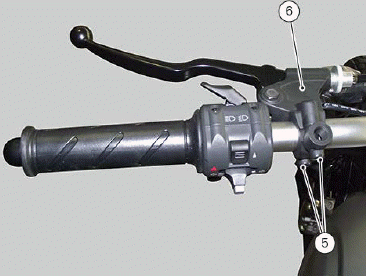
Refitting the clutch assembly
Start the two screws (5) of the clutch control (6).
Tighten the screws (5) to a torque of 10 Nm +- 10%.

Insert nipple (3) in the clutch layshaft (4).
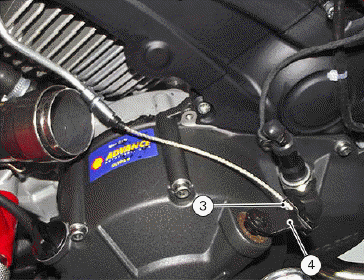
Tighten screw (1) of the clutch mounting bracket (2).
Removing the clutch assembly
Undo the fixing screw (1) of the clutch bracket (2).
Release nipple (3) from the clutch layshaft (4).
Loosen the two screws (5) of the clutch control (6).
Handlebar assembly: ignition switch
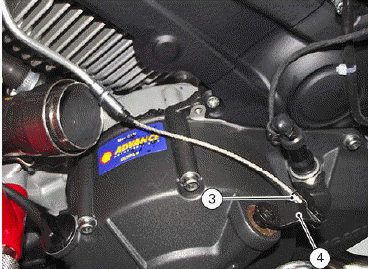
Refitting the ignition switch
Tighten the two retaining screws (2) of the key switch (3).
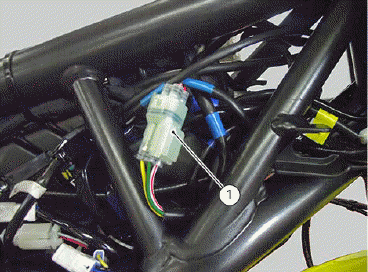
Connect the connector (1).
Refit the headlight.
Refit the tank (Refitting the fuel tank).
Removing the ignition switch
Remove the fuel tank (Removing the fuel tank).
Remove the headlight.
Disconnect the connector (1).
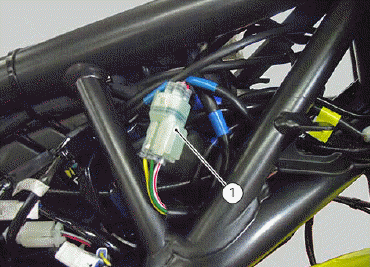
Loosen the two retaining screws (2) of the key switch.
See also:
 Ducati Scrambler 800 - Service manual > Changing the front phonic wheel sensor
REMOVAL PROCEDURE Disconnect front ABS sensor (2) connector (1) from main wiring.
Ducati Scrambler 800 - Service manual > Gear selector control
Refitting the gear change control Grease the two O-rings (10) and the gearchange lever pin (12), except its thread, with indicated product. Insert pin with O-ring (10) fully home in gearchange lever.
 Ducati Scrambler
 Fantic Caballero 500
 Indian FTR 1200
 Moto Guzzi V85 TT
 Royal Enfield Bullet Trials Works Replica
 Triumph Scrambler 1200 XE
 Triumph Street Scrambler
 Yamaha XSR700
 Ducati Scrambler 800
 Moto Guzzi V85 TT
 Triumph Scrambler 1200 XC