 Ducati Scrambler 800 - Service manual > Refitting the tail light
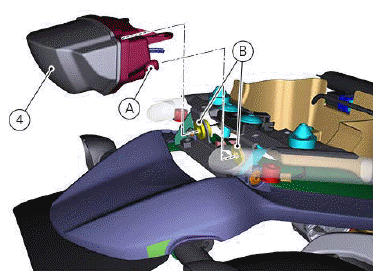
Position tail light (3) so that stud bolts (A) are in their seats (B) on the frame.
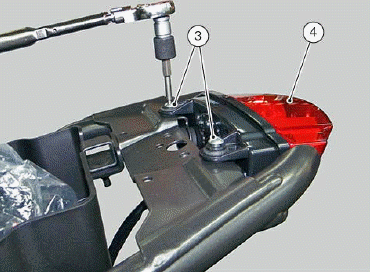
Tighten the two screws (3) to a torque of 5 Nm +- 10%.
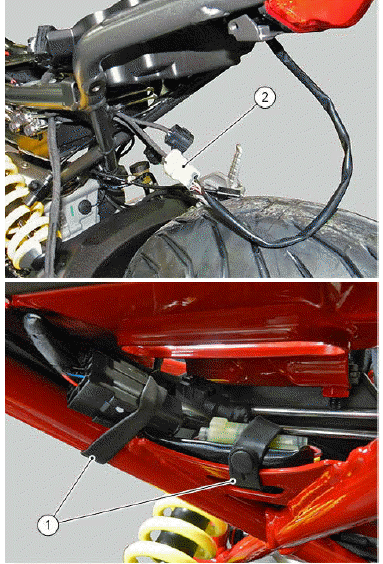
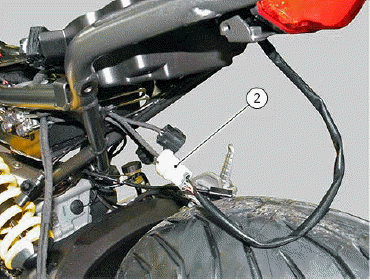
Connect connector (2) and position it by means of two ties (1) as shown in the figure.
Refit the tail guard (Refitting the tail guard).
Refit the seat (Refitting the seat).
Removing the tail light
Remove the seat (Removing the seat).
Remove the tail guard (Removing the tail guard).
Release the cables from the ties (1).

Disconnect tail light connector (2) from main wiring.
Loosen the two retaining screws (3) and remove the tail light (4).

Refitting the number plate holder
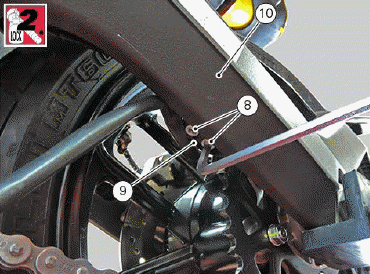
If support (9) has been previously removed, proceed as follows: Apply the indicated threadlocker on the two screws (8).
Fit support (9) on swinging arm (10) by starting it by hand without tightening to torque.
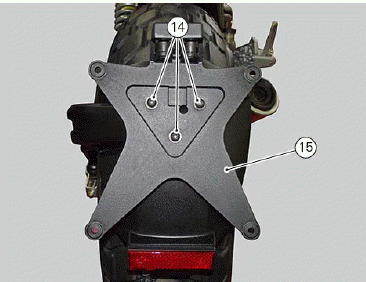
Fix number plate holder plate (15) by tightening screws (14) to a torque of 5 Nm +- 10%.
Route the number plate light wiring in the number plate holder subframe.
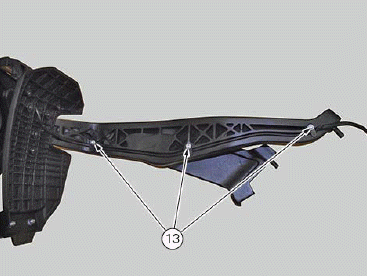
Tighten the three screws (13) with relevant cable plate to a torque of 2 Nm +- 10%.
Important Thoroughly remove the threadlocker from the swinging arm threads and the subframe/number plate holder mating surfaces.
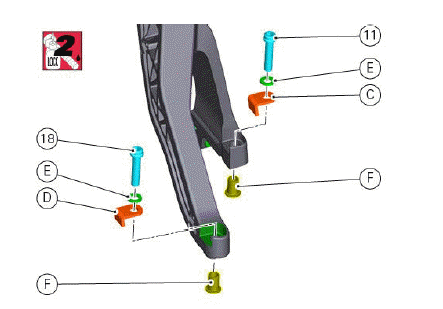
Apply the specified threadlocker to screws (11) and (18).
(11) TCEIF M8X35 screw
(18) TCEIF M8X35 screw
Insert screw (18) with elastic washer (E) and short washer (D) from the outside of the number plate holder subframe.
Insert bushing (F) from inside the frame.
Insert screw (11) with elastic washer (E) and long washer (C) from the outside of the number plate holder subframe.
Insert bushing (F) from inside the frame.
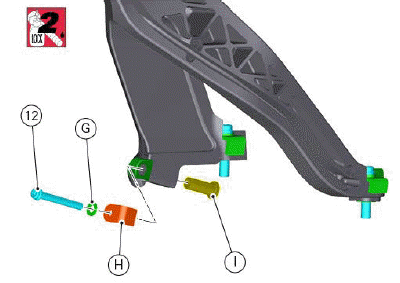
Apply the recommended threadlocker to screw (12).
(12) TCEIF M6X45 screw
Insert screw (12) with elastic washer (G) and washer (H) from the outside of the number plate holder.
Insert bushing (I) from inside the number plate holder.
Position the number plate holder subframe on the swinging arm by starting the screw by hand without tightening to torque.
Tighten the screws in the indicated sequence below.
- Tighten the two screws (8) to a torque of 25 Nm +- 10%.
- Tighten the screw (12) to a torque of 18 Nm +- 10%.
- Tighten the screw (11) to a torque of 30 Nm +- 10%.
- Tighten the screw (18) to a torque of 30 Nm +- 10%.
- Tighten all five screws again following the sequence above.
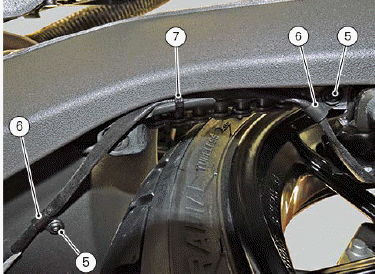
Fit screws (5) with cable ring and tighten them to a torque of 1.5 Nm +- 10%.
Reposition the self-locking tie (7).
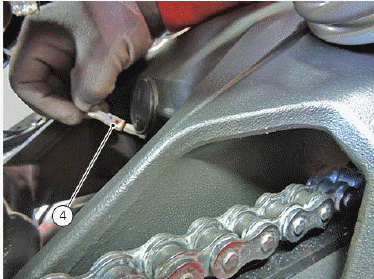
Connect the connector (4).
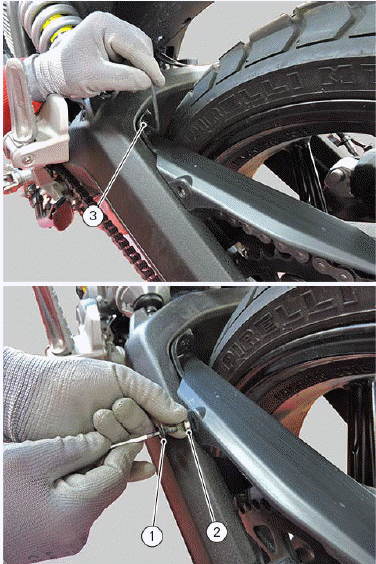
Position the chain guard.
Insert screw (3).
Fit bushing (2) with the relevant screw (1) and tighten screws (1) and (3) to a torque of 5 Nm +- 10%.
See also:
 Ducati Scrambler 800 - Service manual > Removing the number plate holder
Note This procedure is valid for all customisations except the CLASSIC one. To make the number plate holder removal easier, we recommend removing also the chain guard.
 Ducati Scrambler
 Fantic Caballero 500
 Indian FTR 1200
 Moto Guzzi V85 TT
 Royal Enfield Bullet Trials Works Replica
 Triumph Scrambler 1200 XE
 Triumph Street Scrambler
 Yamaha XSR700
 Ducati Scrambler 800
 Moto Guzzi V85 TT
 Triumph Scrambler 1200 XC